Foam tiles on the ceiling allow you to very quickly change the interior of the apartment, update the furnishings with budgetary funds, and even a layman can perform the installation of such a ceiling. The foam panels are very lightweight so anyone can work with them. They are moisture resistant, which allows them to be used for finishing ceilings in any room, including the kitchen, bathrooms and bathrooms.
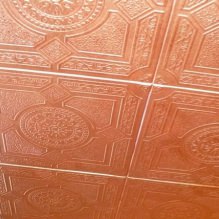
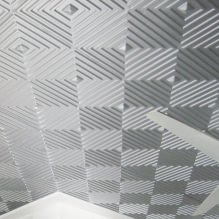
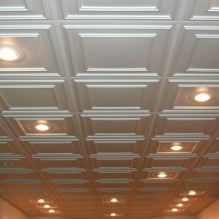
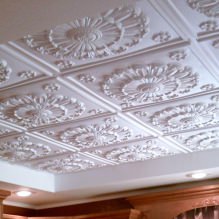
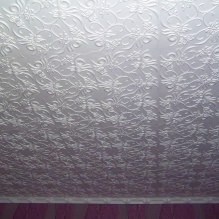
Colors, shapes and volumetric patterns on the tiles allow you to create ceilings of any appearance, they can imitate rough country-style plaster, and the luxury of stucco in the Rococo style, and antique-style caissons. Any design request can be met with foam ceiling tiles.
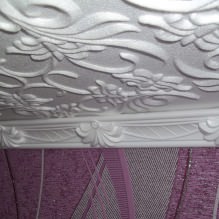
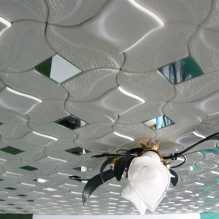
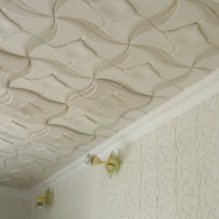
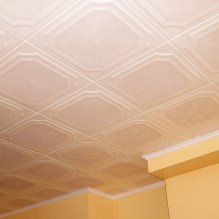
A necessary addition to such a ceiling is decorative skirting boards that cover joints and irregularities. If desired, you can mount an LED strip for lighting on them. So that the foam does not shine, after installation it is painted with water-based or acrylic paints.

Types of foam tiles
The following types of foam ceiling tiles are available for sale:
- Pressed. Are up to 7 mm thick.
- Injection. They are up to 14 mm thick. They are made by sintering foam at high temperatures.
- Extruded. They are made by extrusion of polystyrene mass, after which the tiles are either painted or covered with a film with a pattern.
Tiles also differ in shape. Most often they are square with a side of 50 cm, but there are also tiles in the form of rectangles, rhombuses, regular hexagons (honeycombs). Also popular is a tile that imitates the shape and color of a board-lining..

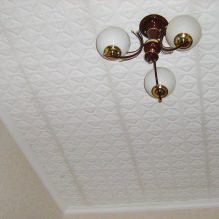
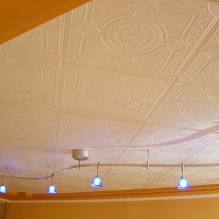
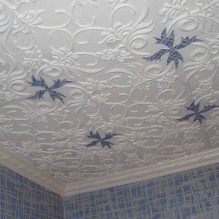
On the front side, the tiles can be smooth or have a relief, plain or covered with film, laminated. Film, like painting, can imitate the texture of stone, fabric, plaster, wood, stucco, or even wood carving. Laminated tiles are used in kitchen areas. Panels with waterproof properties are more suitable for bathrooms and toilets.

Advantages
The main advantage of such a ceiling covering is that it is very easy to glue foam tiles on the ceiling, and even an unprepared person can cope with this..
In addition, the following advantages can be noted:
- Low weight allows the use of tiles on ceilings of any design.
- The tile has sound and heat insulating qualities, and is not afraid of temperature and humidity changes.
- The low weight of the tiles makes it possible to use a simple adhesive that does not have ultra-high strength, and, therefore, a high price..
- This ceiling covering will allow you to save not only on material, but also on work – because it can be done independently.
ATTENTION! Foam tiles on the ceiling can change their physical properties (melt) under the influence of high temperatures, so it is not recommended to install powerful lamps in the immediate vicinity. It is better to use hanging lamps and place them at a distance of at least 20 cm from the tile surface. The tile withstands the temperature of hot water without changing its shape, therefore, it can come into contact with the pipes through which the heating goes..
disadvantages
Foam ceiling tiles differ in the method of production, quality and price. Cheap tiles quickly turn yellow under the influence of ultraviolet radiation, and in some cases are destroyed by dampness. In order to protect it from exposure to light and moisture, it is enough to paint the mounted ceiling with water-based paint.
The main disadvantage is impermeability to moisture vapor. If you cover the ceiling with foam tiles in a room whose walls are covered with vinyl wallpaper, the humidity in the room will increase sharply, which can lead to the appearance of fungus.

Calculation
Before gluing foam tiles to the ceiling, it is necessary to determine how many and which tiles will be needed, why make a calculation, purchase the required amount, and prepare the ceiling surface for installation.
- Method 1: mathematical
To correctly calculate the number of tiles required for renovation, you need to know the length and width of the room. Multiplying these numbers will give the ceiling area, but buying tiles with this figure alone is not worth it. Since some of the tiles can be damaged when cutting, besides, the shape of the ceiling is not ideal, material overrun is inevitable. Therefore, be sure to provide a stock of at least 15% of the total area..
For example, in a room measuring 2×3 meters, the ceiling area is 6 square meters. To cover 1 square meter, you need 4 tiles of a standard size 50×50 cm. Thus, you need 24 tiles for pasting the entire ceiling, and another 2-3 tiles as a reserve. In total, you will need to buy 26-27 tiles.
- Method 2: on paper
On a piece of paper, you need to draw a plan of the room, while maintaining the scale. Next, you need to draw diagonals and place tiles with maximum accuracy from the central part to the edges of the room.
If the wall has a gap of less than 1/2 tile, then 1 piece of tile will cover 2 such gaps. If the gap is more than 1/2 of the tile, then it should be noted that the whole tile will be consumed..

Glue
Foam tiles are attached to the ceiling with glue, and when choosing it, you need to know some subtleties. So, it is very important how quickly the glue sets, how long it takes to dry completely, and also what thickness it has. All this will affect the quality, speed and labor intensity of work..
- Choose thick glue, it will not “merge” off the tiles and get dirty. Glue “Moment-liquid nails”, for example, it has a suitable consistency, in addition, it sets in 10 minutes – which means that you do not have to stand for a long time with your arms outstretched, waiting for the moment when you can release the tile. In addition, the consumption of this glue is small – on average, about 6 ml is spent on one square meter, or for four tiles. Thus, for a medium-sized room, one tube with a capacity of 400 ml is enough, but it is more profitable to take a tube with a volume of 450 ml – such a gun is completed with which it is easy to apply glue, besides, a certain margin is needed for gluing the ceiling plinth at the end of the work.
- Another suitable glue – “Titanium”. It is very durable and sets quickly, but there is one subtlety in its application: after applying it to the tile, it must be applied in place, and then removed, and kept for one minute in the air, after which it is again applied to the same place and pressed firmly. The main difficulty is getting to the exact same place, especially at the beginning of work..
- You can glue foam tiles to the ceiling using cheaper adhesives such as «Dragon», «Eltitans», «Power». They are made in China and are not of high quality. The main disadvantage of these adhesives is the long setting time, so you have to stand for a long time with your hands up, which is quite difficult for untrained people..

Tool
There are few tools for working with foam tiles, and they are all quite affordable..
You will need:
- painting cord for marking the ceiling before gluing;
- scissors or a special assembly knife for cutting tiles;
- putty knife (as well as putty) for leveling the ceiling surface before gluing;
- application roller and primer;
- thread, tape measure and pencil for marking tiles;
- glue brush (or gun), clean cloth to remove excess glue.
Training
Before starting to work with foam ceiling tiles, it is necessary to carry out surface preparation work.
- The packaging of the tiles must be opened several hours before starting work. During this time, it will relieve itself of the stress deformation that appears as a result of packing in polyethylene, and will take on the temperature and humidity of the room where it will be glued.
- The old coating from the ceiling can not be removed if it is even and strong, in other cases it is necessary to get rid of it. The tile will not stick to the whitewash, it must be removed without fail.
- If there are significant defects on the ceiling – potholes, cracks, they need to be filled. Small defects do not need to be repaired, they will be covered by tiles.
- Before you start gluing the tiles, the ceiling must be primed with a roller to ensure better adhesion of the two surfaces. The primer should dry for at least three hours, or even better, four. After that, you can start marking.

Markup
Before gluing foam tiles to the ceiling, you need to outline how it will be located. This is done as follows:
- Determine the center of the ceiling. To do this, diagonals are drawn from the corners of the room through the ceiling, and the center of their intersection is marked. You need to do this in any case, you are going to glue the tiles parallel to the walls, or diagonally to them.
- On each wall, find and mark the middle, and draw a string between the parallel walls – from one mark to the other. The thread must go through the center point.
- Perhaps the walls will be of different lengths, and the thread will shift – then you will have to make an amendment.
- Draw lines along the stretched threads with a pencil – they will serve as a guide when gluing tiles.


Sticking
The tiles can be glued in rows, offset rows, parallel to walls or in a diagonal direction. Glue is applied to the tile in strips, leaving one and a half to two centimeters between them – otherwise, the excess amount will be squeezed out when pressed and may fall on the front side of the tile, spoiling its appearance.
The first foam tile is laid on the ceiling at any angle, from the intersection of the axial at the central point. It must be firmly pressed to the surface and held until the glue seizes. If excess adhesive appears at the edges, it is removed either with a dry cloth or with a sponge. The second tile is glued end-to-end to the first in the second corner from the intersection of the axial. It is also held in place until the glue sets, after which it is released and proceeds to continue work..
TIP: Before you start working on your styrofoam ceiling tiles, check the edges and if there are burrs, carefully cut them off with a sharp knife, otherwise the joints will be visible..
The work continues in a circle, starting from the center and moving to the periphery of the ceiling. When the need arises, the tiles are trimmed, for which preliminary marking is done with a pencil. Cutting is best done with a clerical knife..
ATTENTION! Don’t forget to cut a hole for the chandelier in the center! After finishing the pasting, seal the joints, if visible. The easiest way to do this is with acrylic sealant. At the end of the work, let the ceiling dry for a day, and then cover with paint, water-based or acrylic.

Skirting board
After finishing painting, you can start gluing the ceiling plinth. This business has its own tricks that make the job easier:
- It is more difficult to hold the skirting board against the wall than tiles because it is longer. Therefore, the skirting board greased with glue and applied in place is fixed with small nails every half a meter, driving them into the wall. After a day, the nails can be removed, and the holes from them can be sealed with acrylic putty..
- It is very difficult to dock the parts of the skirting board that converge in the corners of the room. To make them look beautiful, you need to use a miter box – a special carpentry tool for cutting material at an angle. The angle is set at 45 degrees. After gluing the plinth, the slots in the corners are coated with acrylic putty.
- The final stage of work is painting the skirting boards with water-based or acrylic paint.