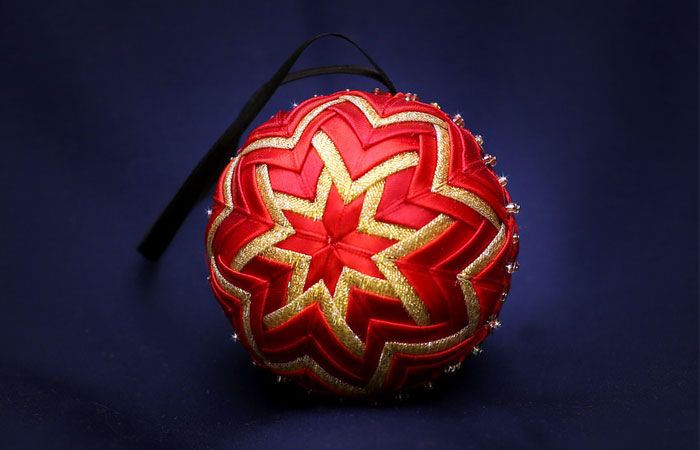
The most beloved and widely celebrated holiday in our country is approaching – New Year. We have prepared a master class, during which we will make an amazingly beautiful festive ball using the artichoke technique, which you can use to decorate your home or give to your loved ones.
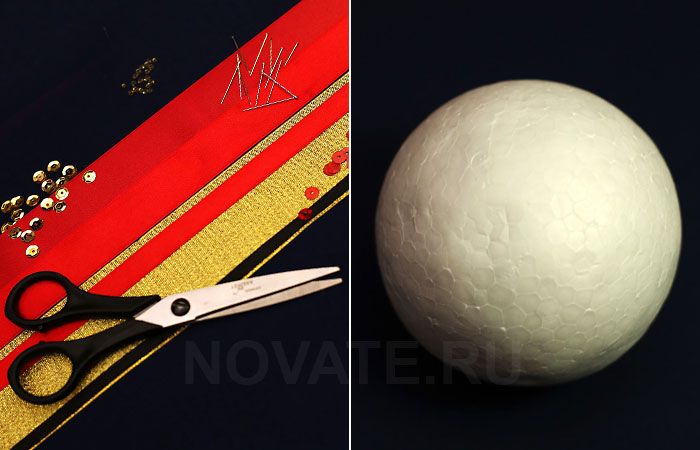
For work you will need:
• Tapes with a width of 2.5 or 5 cm (in this case 4.8 m were taken from the calculation of a tape of 2.5 cm). The balls that are made of ribbons of 3 colors look more impressive; 2 shades of red and gold were chosen for the master class.
• A piece of tape 1 cm wide (about 26 cm);
• A small piece of tape 0.5 cm wide (about 14 cm);
• Tailor’s nails (about 500 pcs.);
• If desired, beads and sequins can be used for decoration;
• Foam ball (in this example 7 cm in diameter).
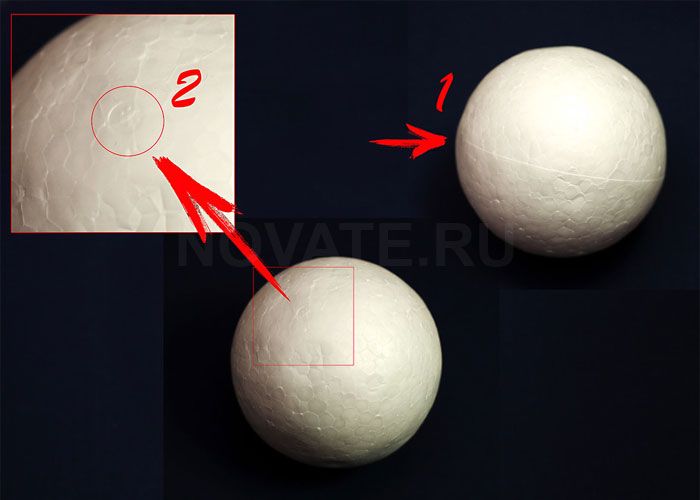
Before starting work, consider the ball. It clearly shows the junction of the two hemispheres – the equator. Our work will be completed along this line. If you look closely at the ball, you can find the poles. On our ball, they look like flowers in a circle.
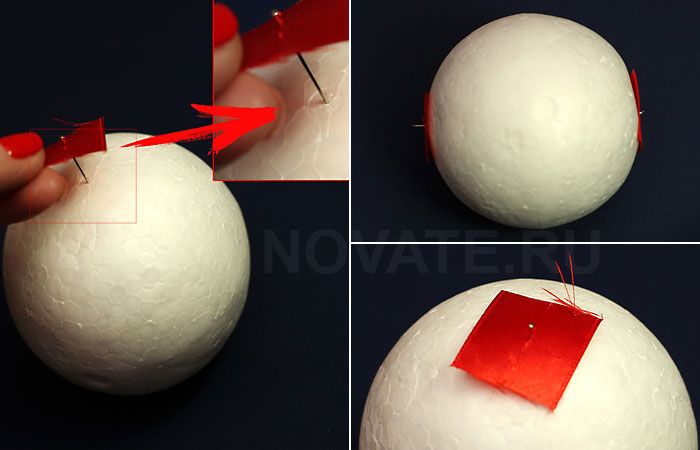
Cut off 2 square pieces from a tape 2.5 cm wide. Stick the carnations with these squares into the poles of our ball. These will be the starting points for the work. Putting the ball aside for a while.
Apply in rows of scales or ribbons
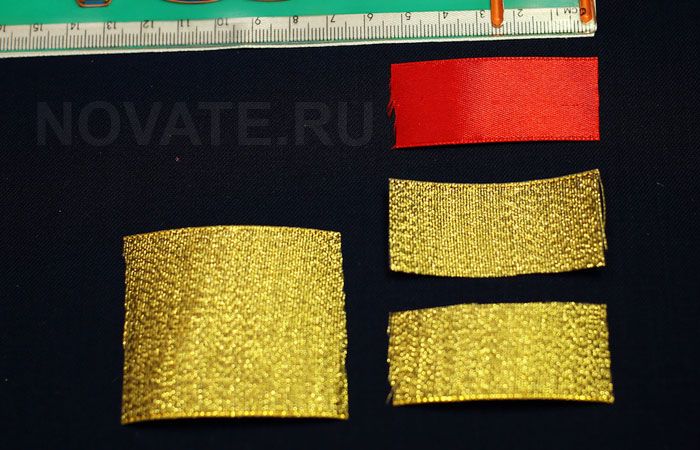
It’s time to get the ribbons ready for the job. We will need pieces measuring 2.5 * 5.5 cm. If you have a tape of the desired color only 5 cm wide, this is not a big deal. Cut off a 5.5 cm shred and cut lengthwise so that each piece has 5.5 cm of the factory edge.
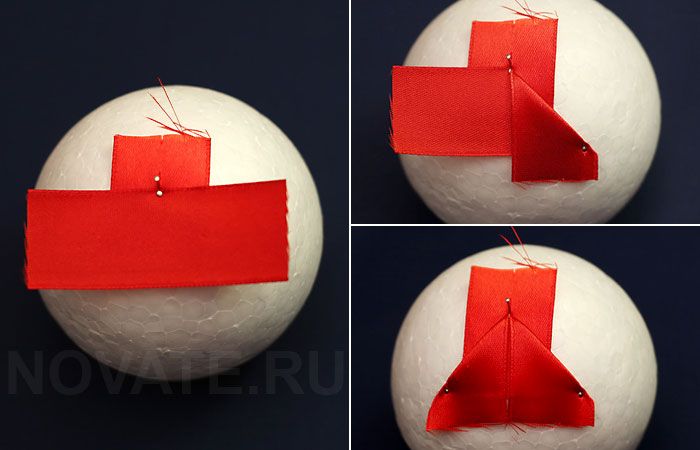
We start with a light shade of red. The first piece is put so that the middle of the edge coincides with the pin in the pole, I pin it. If this is a piece of tape 5 cm wide, put it with the factory edge towards the pole.
Fold the edges of the patch as if we were starting to make a paper airplane. Fix the corners with pins.
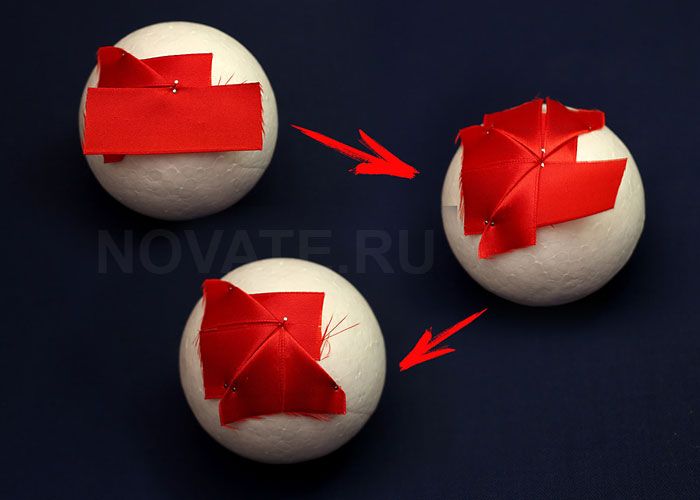
We have already mastered the main part of the technique: we evenly connected the middle, folded and secured one edge, repeated with the second.
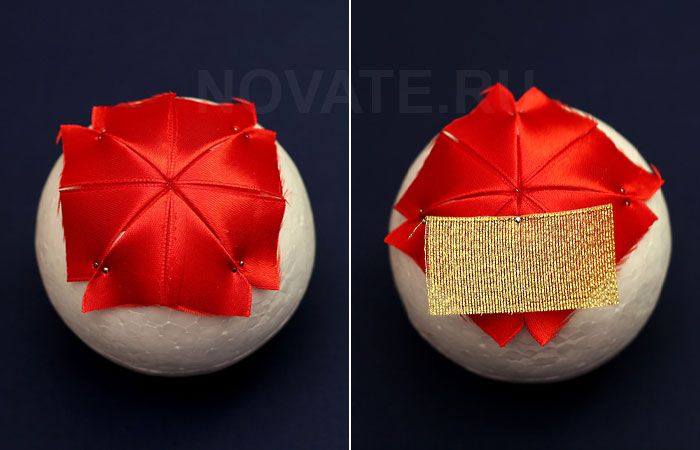
Our first row is ready. The most important thing in this work is accuracy. We strongly recommend doing both sides at the same time: after completing a row from the side of one pole, it is better to immediately repeat it from the back side. So the work turns out to be more symmetrical and creative interest is not lost..
Put gold in the second layer. We put a golden patch with the middle of the edge on the seam between the triangles of the first row. To make the ornament symmetrical, it is better to use a ruler for the first time, later, when the eye is trained, you can refuse it. The second row is located at a distance of 6 mm from the pole.
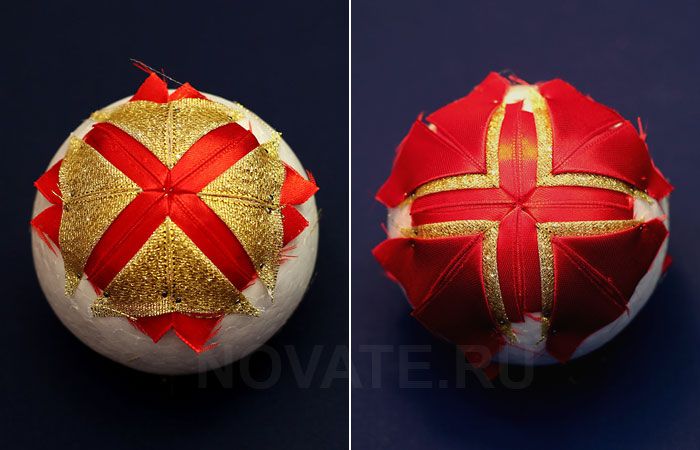
The second layer is finished. Symmetry and parallelism of parts are indicators of the quality of our work. If something turns out uneven, it is better to fix it right away..
The open gold color looks somewhat pretentious and vulgar, so we shift the golden scales with dark red ones, leaving only an edge of 4 mm.
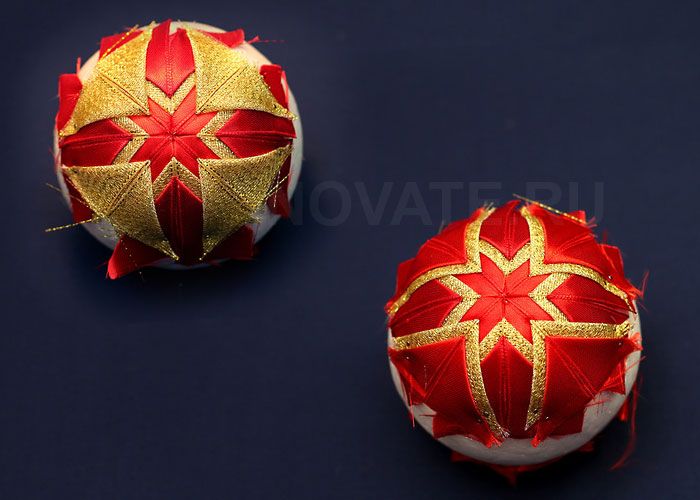
We retreat 1 cm from the pole and put the second one between the scales of the first gold layer, covering it similarly to the first with red, but now light.
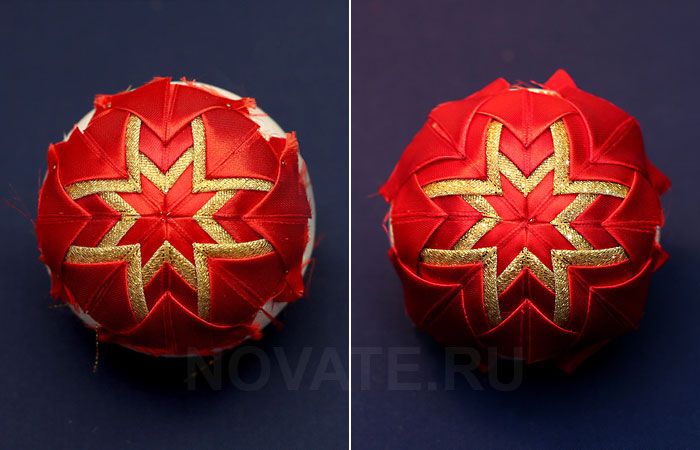
We put a light red layer at a distance of 1 cm from the previous one in this row. Retreat 1 cm and lay out dark red scales.
Add more gold, stepping back 8 mm from the previous scales.
Covering the golden scales with light red.
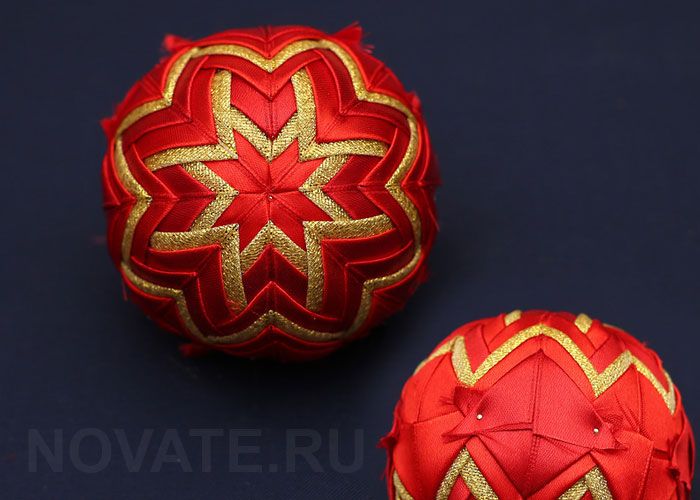
We put the final row, we check that the ornaments come to the equator symmetrically, the foam at their junction should not be visible.
We decorate the equator of the New Year’s ball
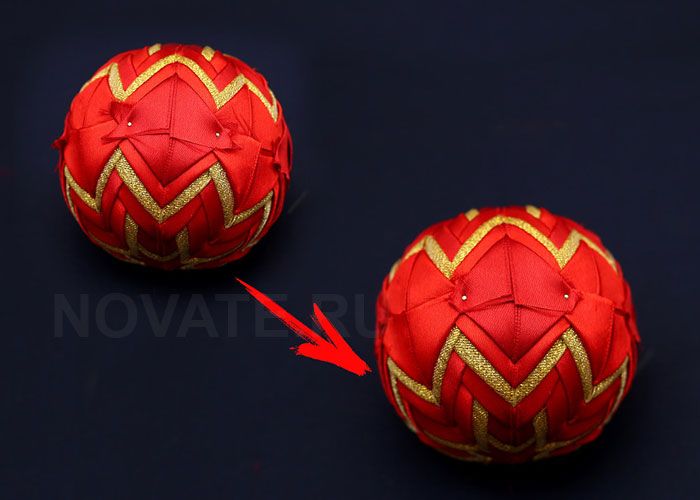
Before we start decorating the equator, we need to remove all protruding ends and threads from the ribbon. They can be cut or melted gently with a lighter..
How to make a loop for a Christmas ball
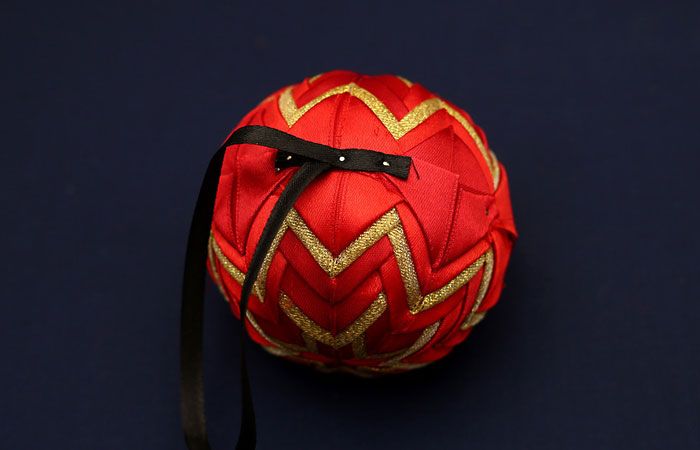
No ball can do without a loop for a Christmas tree. We take a piece of tape 0.5 cm wide (we have it 14 cm long), fold it in half and attach it to the equator with 2 pins on each side. You can use fishing line or a beautiful lace for the eyelet, but it is more convenient to attach them with glue.
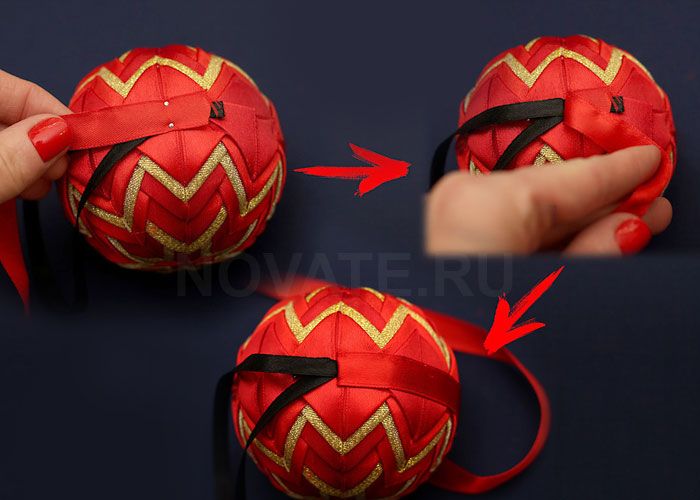
Now let’s decorate. To do this, we need a tape 1 cm wide. We put it seamy side up, closing the loop, and fasten it with pins on both sides as close to it as possible. We bend the tape in the opposite direction and lead along the equator.
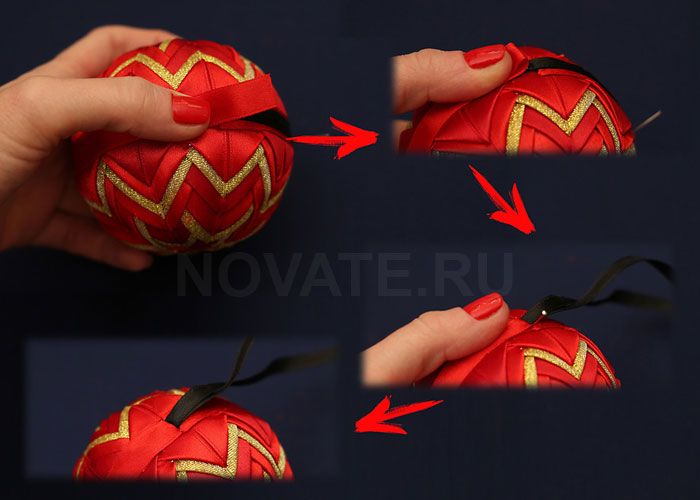
We stretch the tape to the loop. We bend the excess down. Insert a tailor’s carnation into the resulting loop on one side and the other and push it into the foam, closing with a ribbon on top.
The tape can be glued on. This option will be a good solution if you plan to decorate with lace or sequins, which will also be attached with glue..
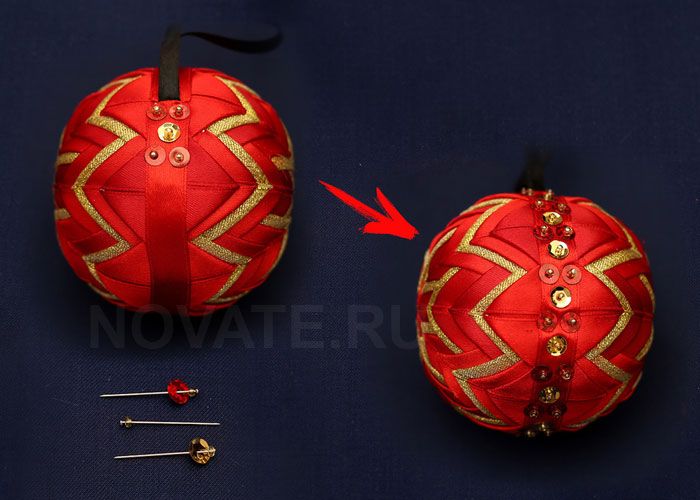
We string beads and a sequin on a pin. By inserting such pins into the ribbon at the equator, we create an ornament. With this decoration with tailor’s carnations, additional fixation with glue is not required..
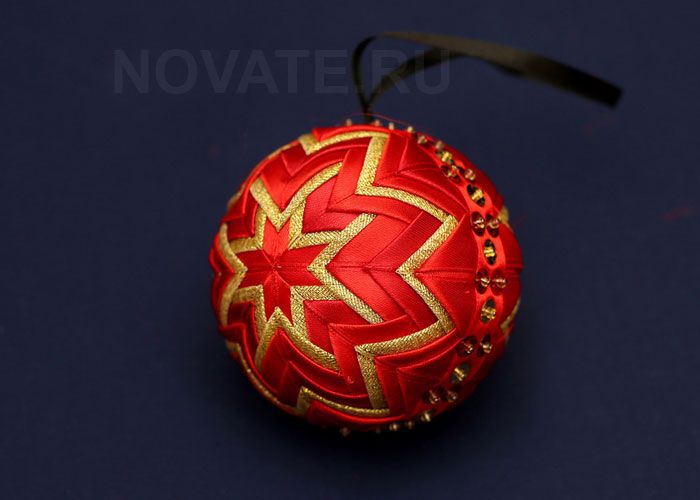
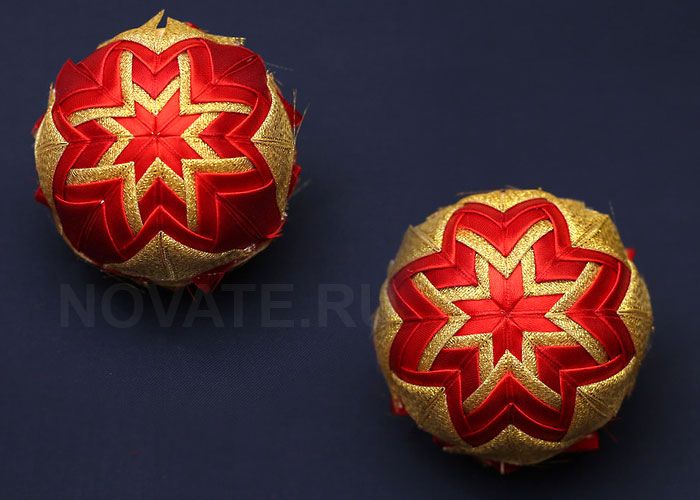
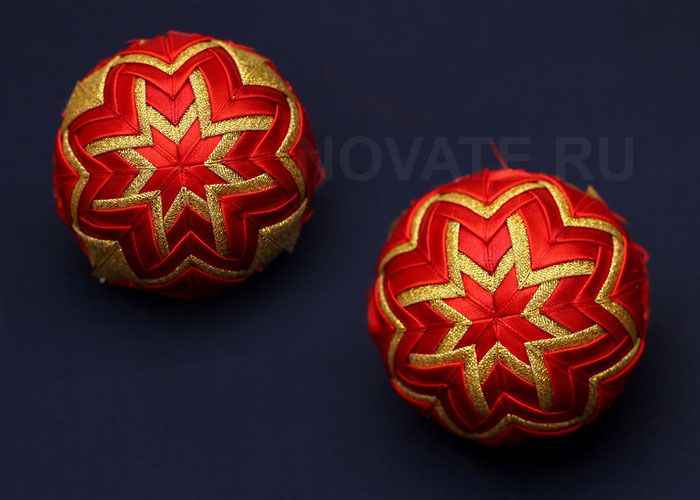
Our New Year’s ball, made using the artichoke technique, is ready!
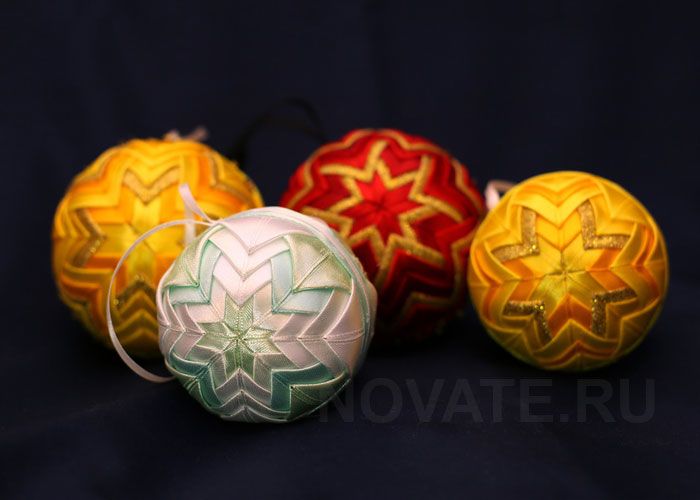
Balls in this technique can be made large and small, with or without brocade ribbons, in different colors and textures.
The bolder your experiment in making such a Christmas tree toy, the brighter and more interesting the result will be.!
Author: Christina Rubina.


