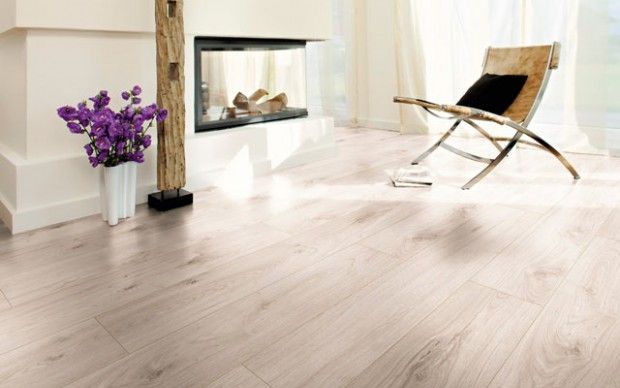
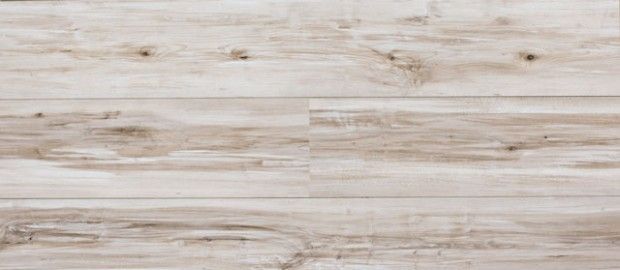
Choosing a laminate as a flooring, the owner of an apartment or house makes the right decision – the material has long earned high marks for performance and beauty. With it, the premises will take on a respectable look, acquire an individual style – imitation of a parquet board presupposes not only a natural wood pattern, but also a stone or other fantasy. Installation is not difficult if you take into account the detailed instructions with recommendations. What will we do!
The nuances of choosing a laminate
A high-quality floor covering will last as long as possible – a fact. But before the acquisition, you cannot focus only on visual preferences, you need to know by what criteria the lamellae are selected – units of the laminate board. So:
- Wear resistance class. Laminate is divided into household and commercial, applicable and at home. The existing classes – from 21 to 34 indicate the period of possible operation. Now classes from 21 to 23 have been discontinued due to the more complicated tests for suitability (you should know that if a number of tests fail at least in one parameter, the lamella is considered substandard).
Laminate of 33 and 34 classes of wear resistance is not used in apartments due to the lack of increased activity. Such species are mounted in places of continuous congestion. Therefore, the best option for an apartment or house will be a 32-class laminate..
- Board thickness. Standard 8 mm. If a smaller value is offered for sale, the purchase is rejected.
- Moisture protection. All edges of the lamellas are waxed. It must be indicated in the product annotation.
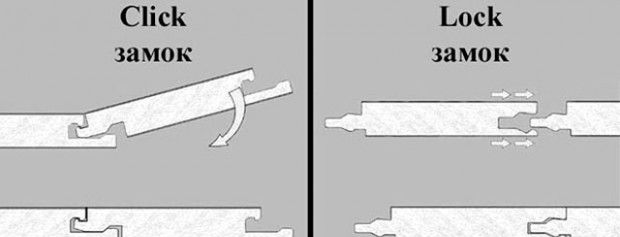
- Castle system. The laminate is mounted in two ways – by the glue method and by the tongue-and-groove Click and Lock mechanisms. The first one has additional protection against moisture, but remains unrepairable. The latter are good for the opportunity to replace one lamella with another and choose better Click.
The manufacturer is not always an indicator of quality. There are worthy examples from the domestic industry and even China. Price varies – high prices «Europeans», medium – with us, low – from eastern suppliers.
The number of lamellas and how the laminate is laid
When all the selection criteria coincide with the chosen batch, it makes sense to think about how many lamellas are required to prevent unnecessary waste of funds. It is important to consider that for amateurs, the process goes with difficulty the first time. Therefore, the optimal amount is considered to be 10% of the floor area – for pruning, scrap and other needs..
The amount of laminate is also influenced by the installation method – parallel or diagonal. The latter allows you to visually increase the boundaries of the room. For this installation, the number of lamellas is increased by 20%..
Required tools
The list is as follows:
- Roulette and square. The latter is needed to accurately find the right angle.
- Electric jigsaw. Cutting the measured material with it will turn out to be of high quality, without chipping and uneven edges..
- Wooden hammer for tamping lamellas.
- Marker for labels.
- Wedges. You do not need to buy them specially – dies 15 mm thick are suitable.
- Masking tape and foam backing 2-3 mm thick.
Before work, it is recommended to expand the lamellas to adapt to the room temperature for a day. Thus, stress is relieved from the material..

Preparing the substrate for laying laminate
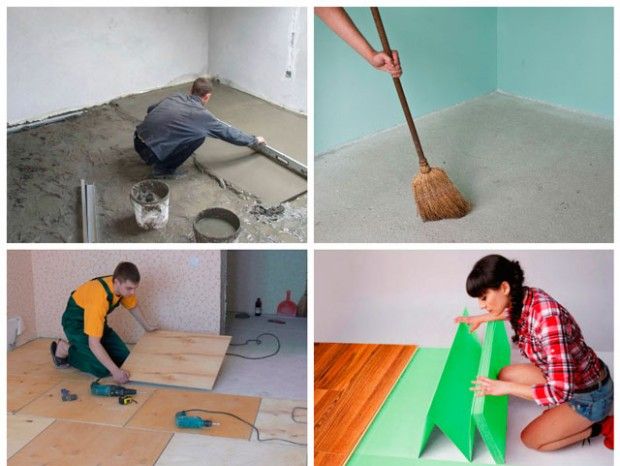
Preliminary work with the floor consists in leveling the surface and laying a shock-absorbing underlay, which will act as a sound insulator and additional protection from moisture. Details:
- The base for laying the laminate is evaluated – there should be no dust, small potholes. Even acceptable surfaces must be degreased and dried.
- Depending on the condition of the concrete floor, a new screed with reinforcement or a thin, leveling screed is placed. The thickness of the base plate for uncoated concrete is 3 mm. If wooden logs, boards or plywood are supposed – 2 mm.
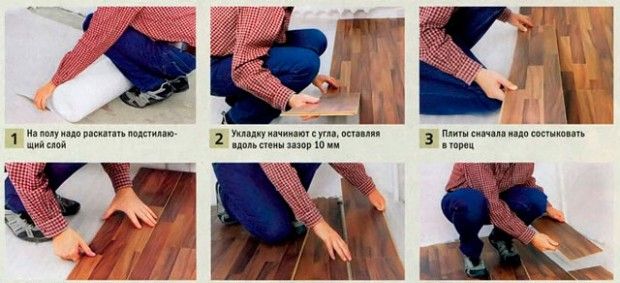
- The substrate is lined without overlap – end-to-end. Glued for fixing with tape. It is recommended to put the sheets on the walls, compensating for the future linear expansion of the material, or to buy a special damper tape. After laying the laminate, the edges are carefully cut off with a clerical knife..
- Examine weathered laminate boards. If any defects are found, the lamellas are set aside – they will come in handy for trimming or replacing. It is important to remember that the imitation of a natural pattern must correspond to the original – there are no two identical cuts of wood.!
The preparation of the base is completed. It takes a little time, but it happens carefully, since the result and further operation of the coating depends on it.
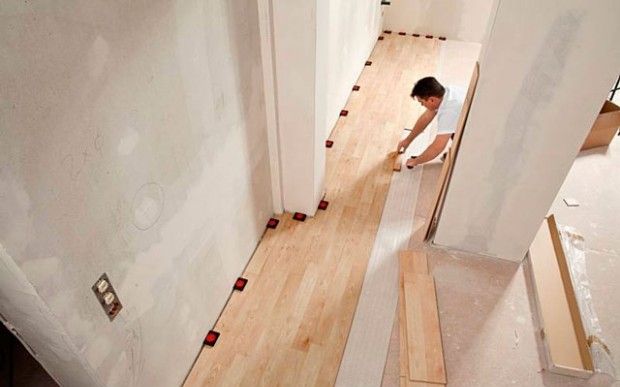
DIY laminate flooring: step by step instructions
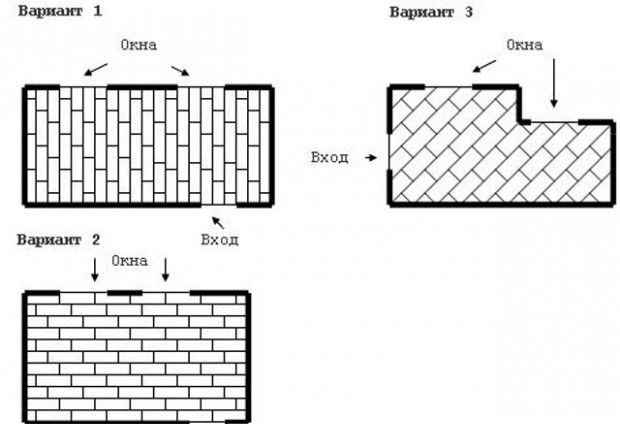
The parallel laying of the laminate is carried out perpendicular to the window – sunlight will favorably emphasize the coating. In both methods, installation is carried out from the upper left corner of the room. Let’s start:
- From the first row of lamellas, side locks are cut off, abutting against the wall. The initial unit is also freed from the end part..
- Laying is as follows: the next lamella is inserted into the lying lamella at an angle and lowered until it clicks. It means that the clutch has occurred. The work is carried out to the end.
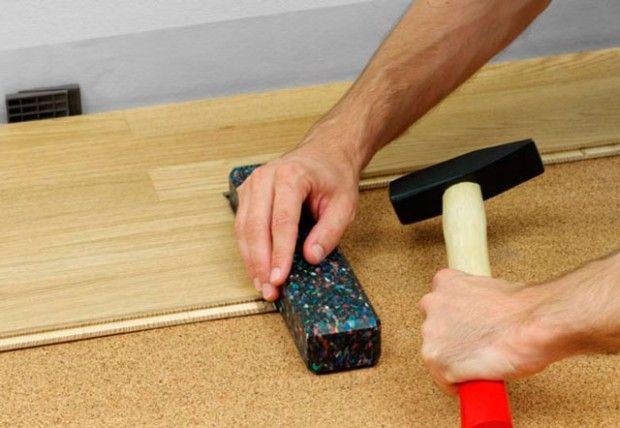
- The second row is laid in a similar way to brickwork. The initial lamella must be trimmed so that the joints of the first row fall on the body of the whole element of the second. The side locks are fixed with a mallet – with careful movements the laminate is knocked against one another.
- The apartment is not complete without pipe connections and you need to carefully bypass them with laminate. This is done as follows: the distance from the wall to the center of the pipe is laid on the lamellae, a circle is outlined, the board is sawn in half. Now «surround» pipes with laminate will not be difficult. To increase the tightness of the joints, plastic or rubber pads are purchased in advance.

Thus, all the work is being done. Nuances can be in the transition from laminate to tile or other coating. For this, there are thresholds with grooves for fasteners. Holes are drilled at the joints of the two coatings, where thresholds with screws or dowels are carefully inserted. They are hammered to the desired position with a hammer..