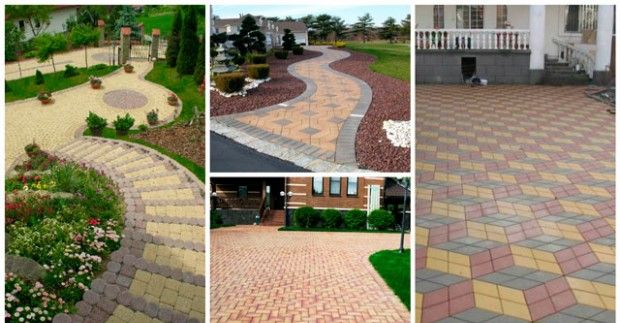
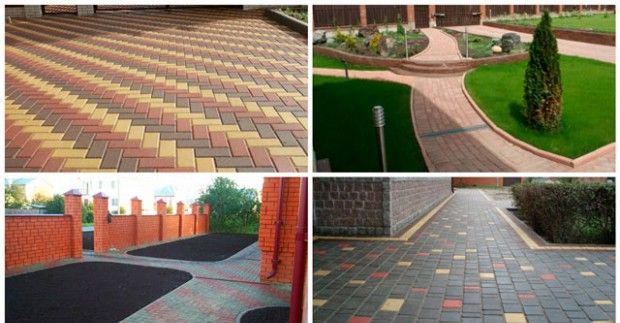
Paving slabs are common as a material used for finishing pedestrian paths, sidewalks, blind areas, squares and similar objects of the exterior of streets and household plots.
The tile has positive characteristics from the point of view of operation, including ease of installation, durability of use, high strength indicators, aesthetic appearance and many others..
The modern market offers a wide range of possible options for the manufacture of material, so each site owner can express his design best practices. The following material is devoted to the description of how the paving slabs are laid with their own hands..
Laying schemes and methods
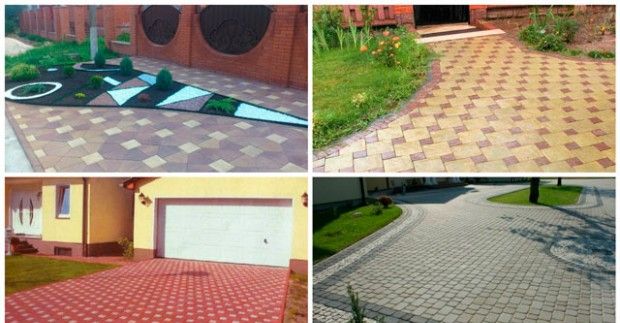
Before proceeding to the description of the laying technology, it is worth considering the existing methods and schemes for laying paving slabs. It is important to understand here that finishing with paving slabs is part of the general work on creating a landscape design of the territory and the choice of a specific laying scheme should be made in accordance with a certain style..
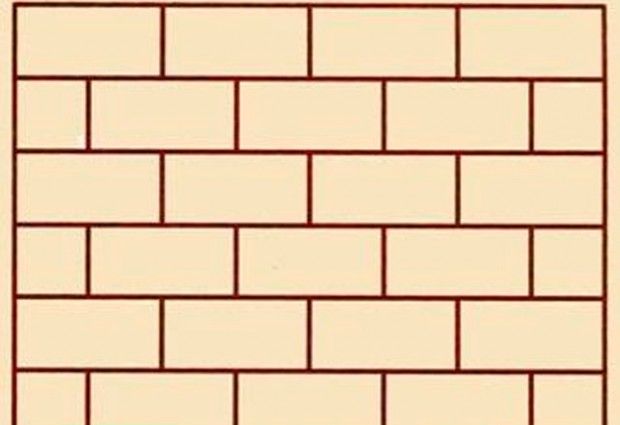
Among the most common laying patterns are:
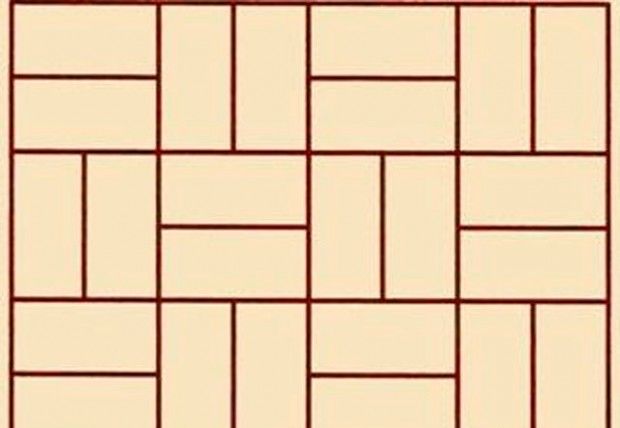
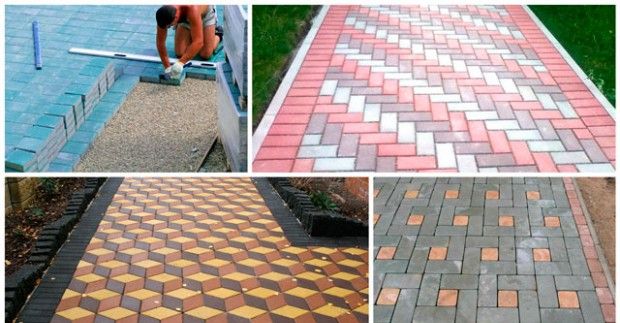
- Classic scheme. Here we mean that the tiles are laid in rows parallel to each other, where the joint of two tiles of the previous row is located in the middle of the width of the tile of the next.
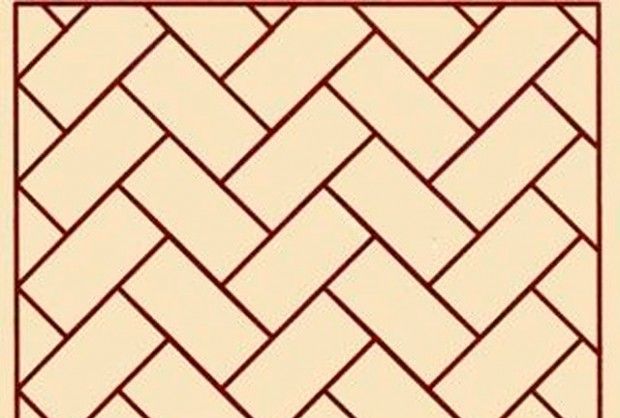
- Linear-angular scheme. With this option, the tiles are laid in rows, but the individual tiles are located at an angle relative to each other, as a result of which a pattern resembling a herringbone is formed..
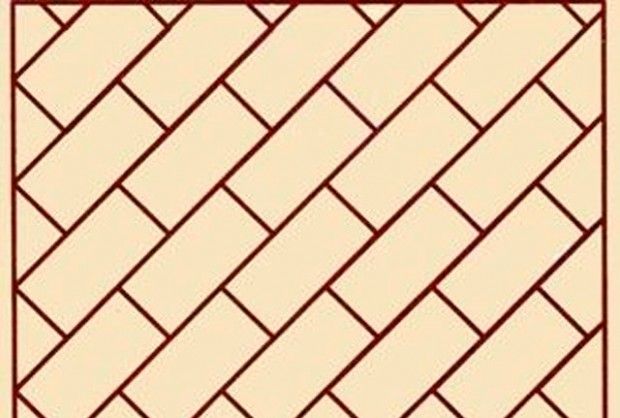
- Diagonal diagram. Laying tiles according to this scheme resembles the classic version, but has corresponding differences.
- Block diagram. The tiles are stacked here in blocks that include two or more elements..
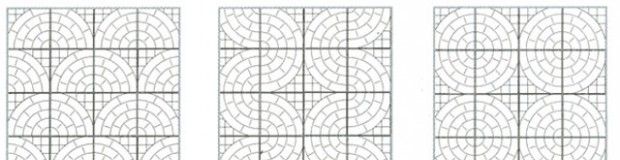
- Artistic scheme. Here we are talking about a variety of laying patterns, depending on the level of skill of the performer and design considerations..
All of the above schemes can be combined with each other, which, if desired, allows you to achieve a unique appearance.
Materials and tools
The key to a successful result of actions is thorough preparation, namely, you should purchase and store the necessary materials and technical devices. This will optimize the workflow, which will save time and effort. To lay paving slabs with your own hands you will need:
- Angle grinder with mounted stone cutting disc.
- Rubber mallet.
- Measuring devices: tape measure, building level.
- Master OK.
- Brush.
- Special rule about 1.5 meters long.
- Marking material. Strong cord, wooden or metal pegs, pencil, etc..
- Shovel and bayonet shovel.
- Cement.
- Curbs to limit the site.
It should not be forgotten that for laying paving slabs, you will need clean sand without impurities, in volumes depending on the territory planned for finishing.
Laying paving slabs with your own hands: step by step instructions
Upon completion of the above steps, you can proceed to the direct work on laying paving slabs with your own hands. To achieve a high-quality result, it is advisable to divide them into several separate stages, which should be performed sequentially..
Training
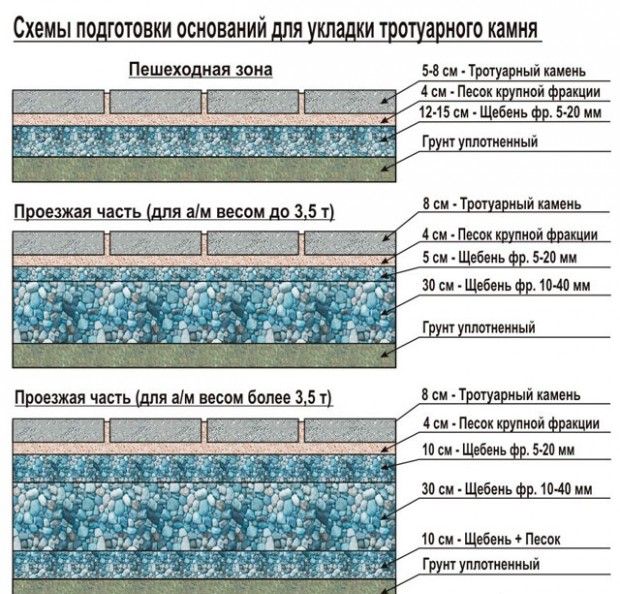
Work should begin with preparing the site for them. Here we are talking about carrying out all measuring and marking work. In this case, special attention should be paid to the definition of the so-called zero level. The lowest point of the site is used as it, from which all further measurements are made. It should also be noted that the width of the work area should be selected based on the width of the individual tiles. Ideally, only whole tiles should be laid across the width.

In addition, the entire old coating, if any, part of the decor and fasteners of the sheds, as well as all other exterior elements that can affect the work process, such as poles, supports and others, are subject to dismantling. After that, the site is leveled taking into account the zero mark. Over the entire area of work, you need to remove a surface layer about 15 cm deep, after which the depression is filled with fine gravel (if the soil is soft) and sand. The layers are compacted, thus forming a cushion for further work.

At the same stage, the installation of special beacons is carried out, along which the base will be aligned. As these elements, you can use profile pipes of the required section. The pipes are laid on the level, then a layer of sand is poured, which is leveled using a rule. After removing the beacons, the remaining space is also filled with sand and leveled.
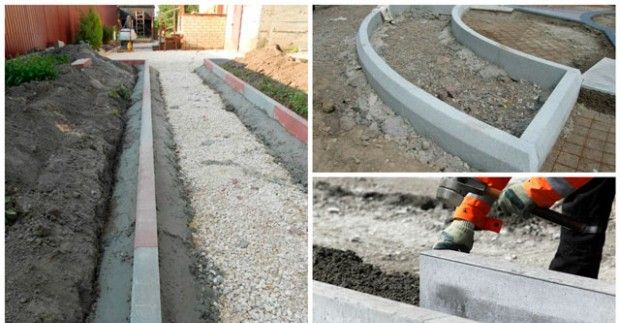
Installation of curbs
This is followed by the installation of restrictive borders around the perimeter of the site. These elements are installed strictly in level, close to each other. On the inner and outer sides of the blocks, it is necessary to apply a layer of cement-sand mortar using a trowel to fix them. The preparation of the mixture consists in combining cement and sand in a ratio of 1/3, after which the mixture is diluted with water until it acquires a thick and homogeneous consistency. If necessary, the curbs can be sawed off with a grinder with a suitable cutting disc.
Laying tiles
Upon completion of the previous steps, you can proceed to laying the tiles themselves. Everything is relatively simple here – the elements are stacked at a distance of about 5 mm from each other, in accordance with the previously selected scheme. To control the gap width, special mounting crosses are used. Work is carried out in successive rows over the entire area. After the installation is completed, grouting is performed. To do this, use a mixture of sand and dry cement..
At this point, the main stages of laying paving slabs can be considered completed..
Tips
In addition to what has been said, you can add some tips regarding both the choice of the optimal laying scheme and the conduct of the work itself, which will make it possible to better organize work, and this will have a positive effect on the quality.

- The purchase of tiles should be made with some margin in case it is necessary to adjust the pattern, marriage and other factors.
- When sawing tiles, it is not necessary to cut the entire thickness. For this, a small cut will be enough, after which the tile breaks off with a light blow from a mallet.
- If, for some reason, laying entire tiles across the width of the area is impossible, the fit of the joint should be done not close to the curb, but 2 tiles from it. So shortened elements will visually get lost..
- When choosing a laying scheme, it should be borne in mind that a pattern that is transverse to the observer will visually expand the area, and the longitudinal method of laying will make it longer when perceived.
- It is better to prepare a grout mixture from cement and sand in a ratio of 1/6. The first rain turns the tiled surface into an almost monolithic coating.
Among other things, when working with paving slabs, it is necessary to observe general safety measures and observe all technological rules for carrying out work.

Laying paving slabs with your own hands
To ensure the most complete and holistic perception of the material presented, it is recommended that you familiarize yourself with the thematic video below. The material demonstrates the laying of paving slabs on a personal plot as a pedestrian path and a foundation area at the same time.