“Curly trim» – this is how this decorative tree for interior decoration is literally translated from Latin. Other name «tree of happiness». Topiary symbolizes well-being and attracts wealth to the house.
Today it is a popular handicraft, because «to grow» a tree can be made of anything, the main thing is desire and patience.
What a standard topiary consists of?
- Crown. This is the main part of this decoration. The crown is made of anything: small flowers, silk ribbons, coffee beans, decorative butterflies, pearl beads, colored buttons, etc..
- Ball base. The crown elements are attached to it. There are also a lot of opportunities here: a wad of newspaper, polyurethane foam, paper papier-mache, even a balloon.
- Trunk. It is enough to pick up something similar in shape: a stick, a cardboard roll, a thick branch, even a pencil will do. The trunk is then painted or wrapped with tape.
- Pot. The capacity is selected suitable for the general image. The pot can be bought ready-made or made by yourself. For example, from a plastic cup.
- Decor. Anything is suitable for decoration, just connect your imagination to «ennoble» topiary with cute decorations. The main thing is not to restart the tree..
Materials and tools for topiary
As with any handicraft, a tree of happiness requires materials and tools, without which the manufacture of topiary is impossible. What do you need for this?
- Scissors and thread to cut into pieces and hold the base ball together.
- Glue, it should be transparent – there should be no traces on the tree.
- Satin ribbons. A must if you are making a satin topiary.
- Decorative elements: beads, rhinestones, bugles, stones, buttons, etc..
- Braid, you will need it for winding the barrel, can be replaced with a thick cord.
- Capacity where you are «plant» your tree. Pot or mug.
- The stick needed for the barrel. Better to find the right branch.
- Newspaper from which you will build the base of the ball (if there is no ready-made foam).

Popular varieties of topiary
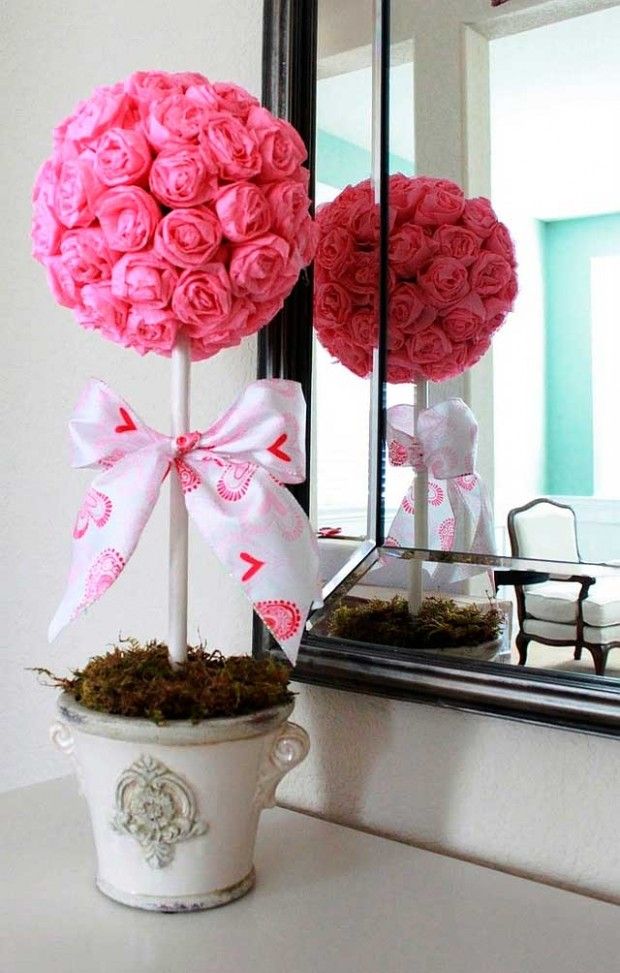
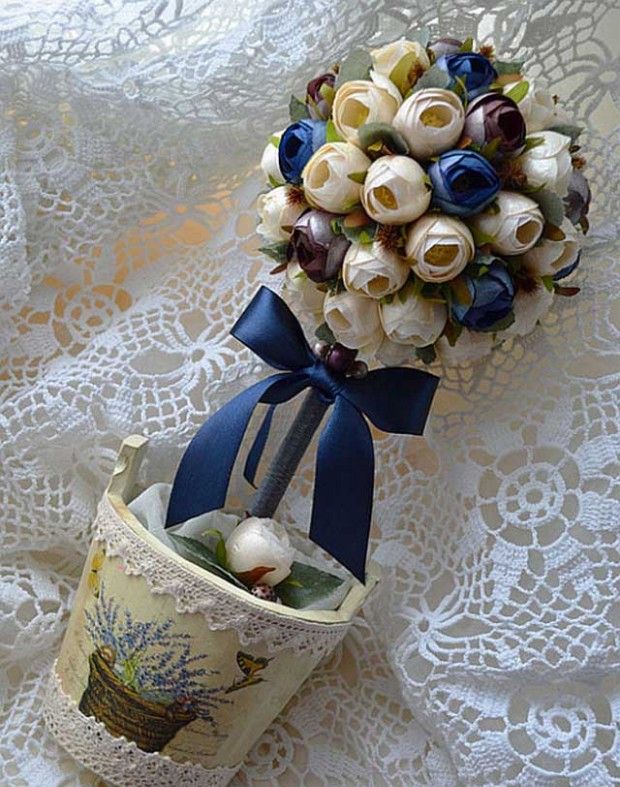
- Flower topiary. The buds (for example, roses) are made of crepe paper and attached to a frame of crumpled newspaper and wire. A mug is suitable as a pot.
- Coffee topiary. A variety for lovers of coffee smell. Heart shape is popular.
- Money topiary. The original version, which uses paper or metal money. Banknotes are used real or copies from a joke store.

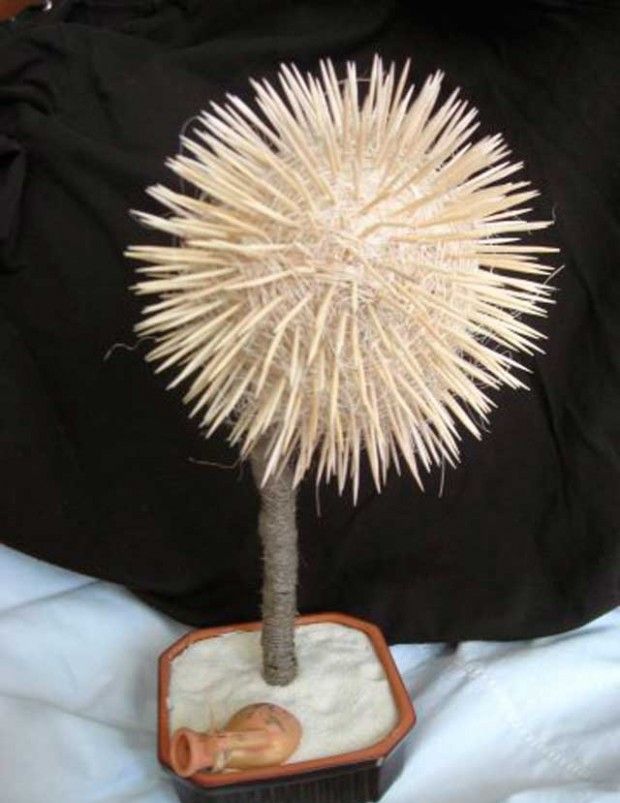
- Thorny topiary. This bizarre type of tree is formed from everything that pricks: pins, toothpicks, decorative needles, etc. It looks like a dandelion.
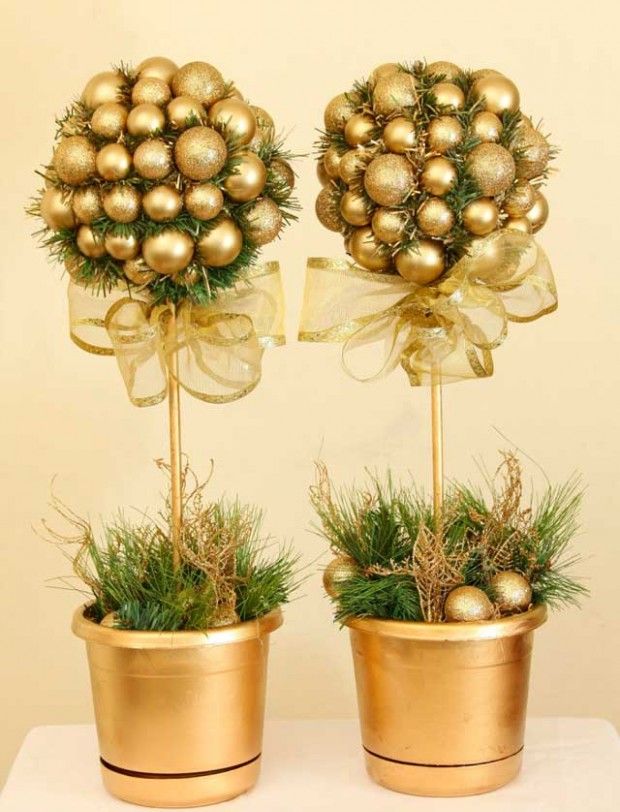
- New Year’s topiary. Such a tree is made from New Year’s toys and tinsel..
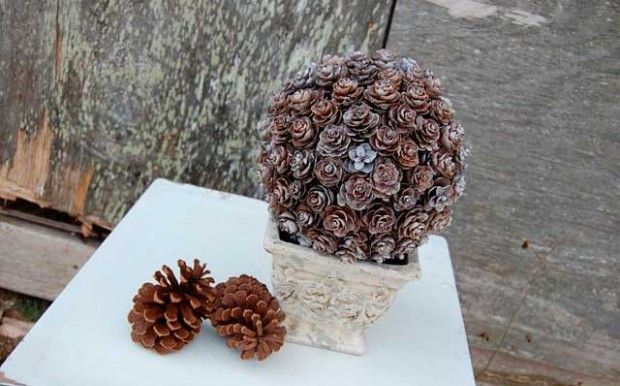
- Chestnut topiary. Acorns and chestnuts are the material for the tree of happiness. This composition looks cozy and home-like..

- Paper topiary. Another popular option is a napkin tree, which can be decorated with pieces of fabric, pine needles, beads, etc..

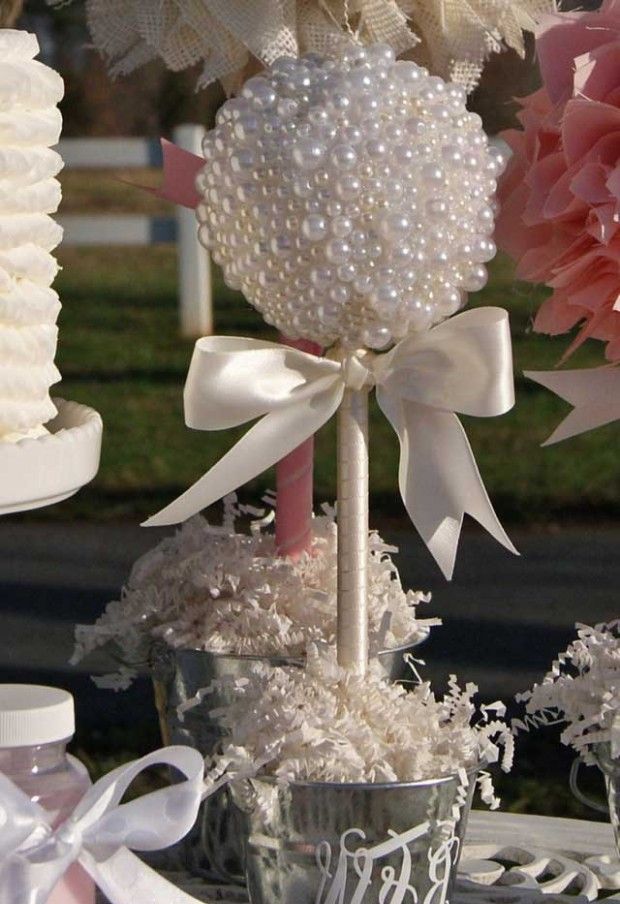
- Pearl topiary. The base ball is decorated with pearl beads. As a wedding gift, this look is ideal.
- Inverted Topiary. This is a complicated but extravagant option. The decor elements seem to flow out of the vessels on the saucer, forming a trunk. They can flow out of mugs, glasses, pots and vases..

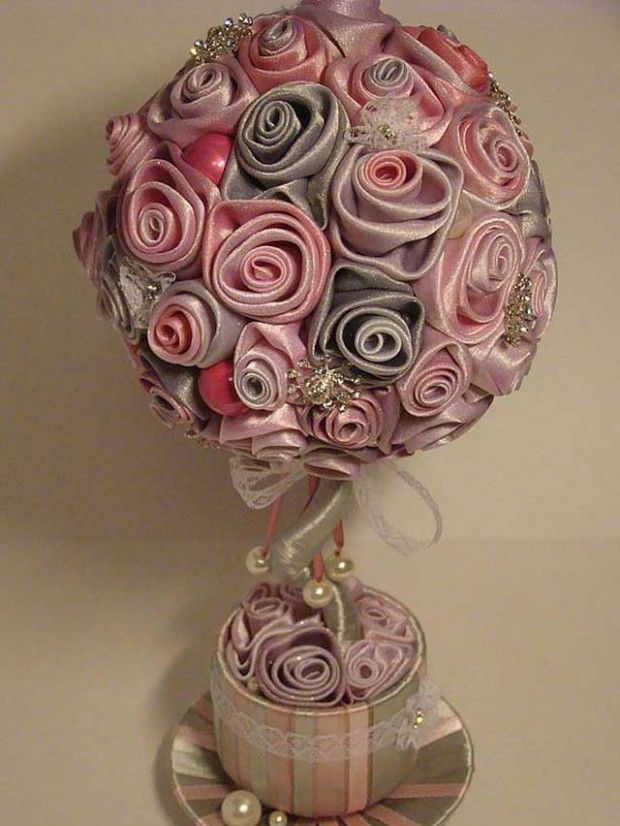
- Satin topiary. Satin ribbons are used for manufacturing. This variety is one of the most popular, and below we will give a master class with step-by-step instructions.
Master class on how to make topiary from satin ribbons
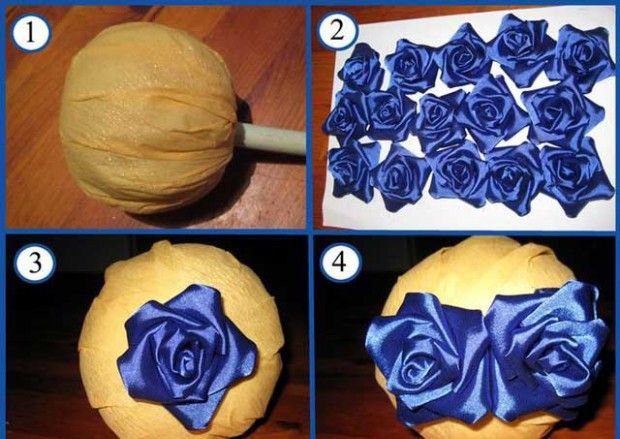
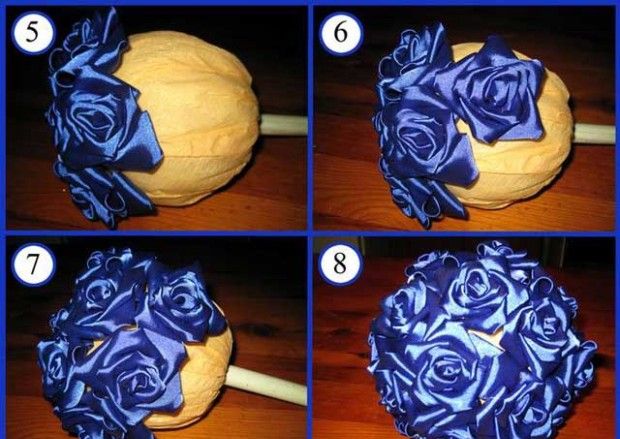
Making a tree of happiness begins with the crown. It is recommended to use crepe paper for the base of the ball to get «Chupa Chups», then you need to build 15 small roses from satin ribbons. And with glue, attach all the roses to the ball.
- First, the first flower is glued, then others are attached in a row under it. The result will be a ball of roses, but with free space for green foliage..
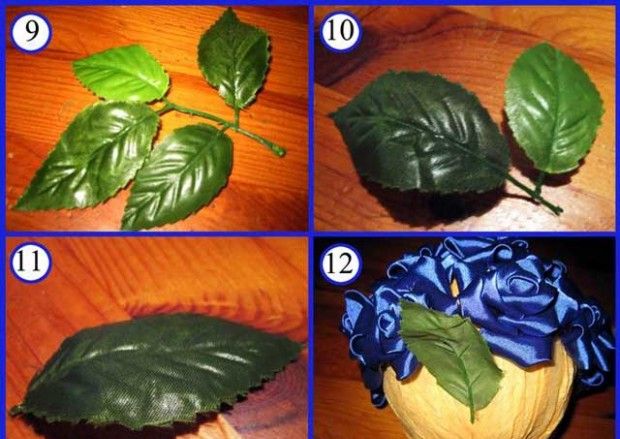
- Next, we take artificial leaves, scattered and in the form of twigs. It is desirable that they are the same size. And carefully glue them under the satin roses, to the place where there is free space of crepe paper with a trunk in the middle.
Important: arrange the branches in a checkerboard pattern. They need to be fastened in several rows to get lush foliage. As a result, if you look from above, the view of the future tree should resemble a neat wedding bridal bouquet..
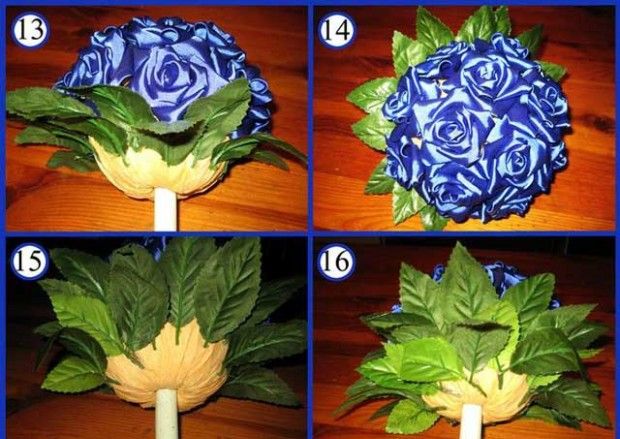
- If you see that the bunch does not look luxurious enough, or there is free space, you can stick more leaves. Place the branches all the way to the base of the trunk. Avoid «bald spot» and do not spare twigs and leaves.
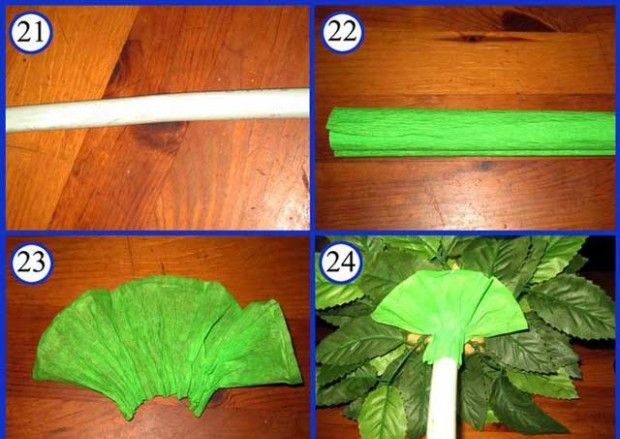
- Now we go directly to the trunk itself. We decorate it with green crepe paper, first of all we make the base of the crown in the form of an accordion and glue.
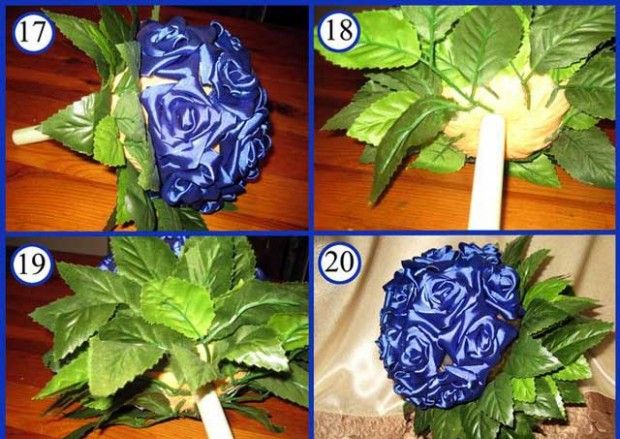
- Then we wrap the trunk with the same paper (it is better to cut off a long strip). We fix the edge of the paper at the base with glue, wrap the stick, and fix it again. It is recommended to use a plastic embossed cup as a vase.
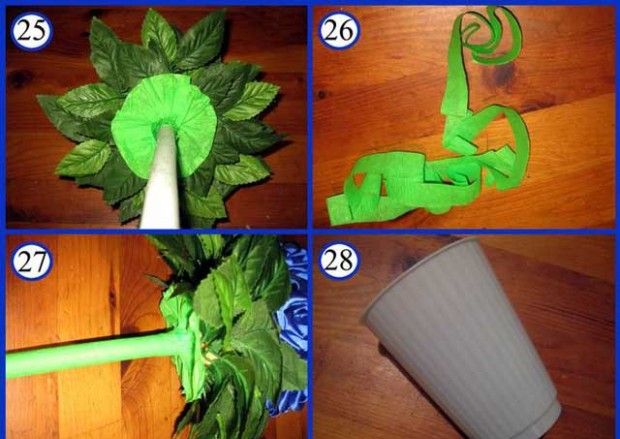
- Cover the future tree pot with gold paint (sold in spray cans) and leave to dry. Prepare a wide ribbon (for the bow) in the same color as the roses. Attach it to the base of the trunk under the branches, and put stones on the bottom of the glass..
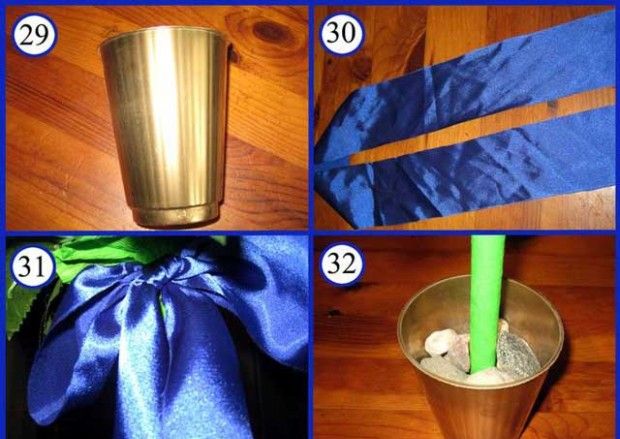
- Now we make gypsum to fix the tree in the pot. A regular building block will do, pour it into a glass and stir thoroughly, adding water. You should get the consistency of thick sour cream, which you need to quickly «transplant» wood.
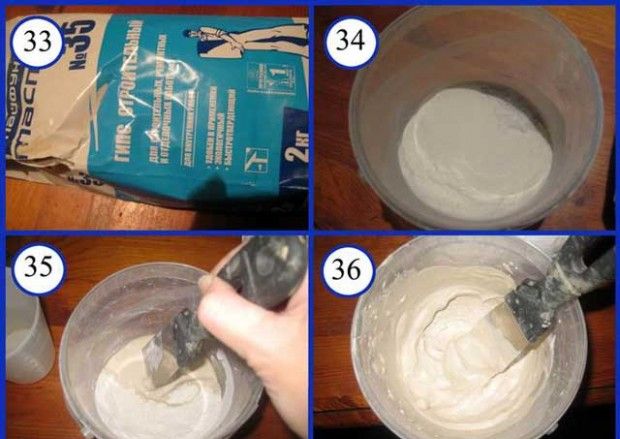
- Pour the plaster cast into the pot of rocks, remember to line up the edges. Wait for the plaster to harden and decorate the surface with pebbles to match the color of the roses. Scatter small beads between the stones, spread the glue with a toothpick, decorate the roses with drops of varnish.
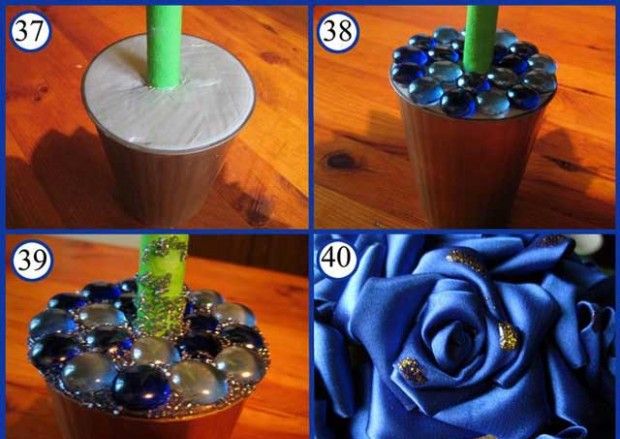
- As a result, you will get such a beautiful tree of happiness made of satin blue ribbons..

Topiary from satin ribbons: video instruction
You can also watch a video tutorial on how to make a topiary from satin ribbons.