Rabbit breeding is quite a profitable business. It does not require special costs and efforts, but you can earn quite good money. But even if you do not plan to seriously breed rabbits, but just want to keep these cute fluffies at home, you should know that the animals need to create acceptable conditions. That is why much attention is paid to the most important of these conditions – the place of residence, the rabbit cage. Of course, you can buy or order it, but it will be much cheaper to do it yourself – in this case, the cage will be guaranteed to meet all the parameters that you need.
Types of rabbit cage designs
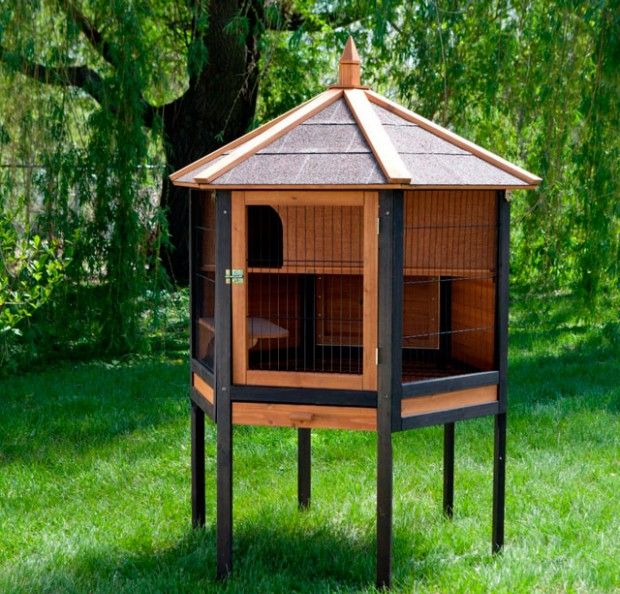
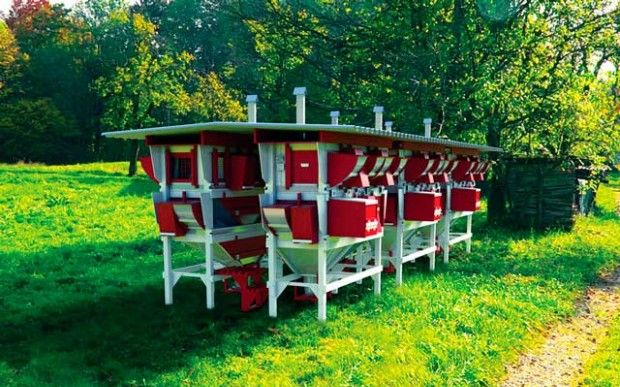
First you need to find out what kind of cell you need. There are several classifications of rabbit cages. One of them – street and cells for indoor. Everything is obvious here: street cages are warmer and more durable, resistant to bad weather, they are also larger in size, since there are no restrictions imposed by the room. Street cages are handy if you keep a large number of individuals. Households are simpler and smaller, they do not emphasize strength and insulation.
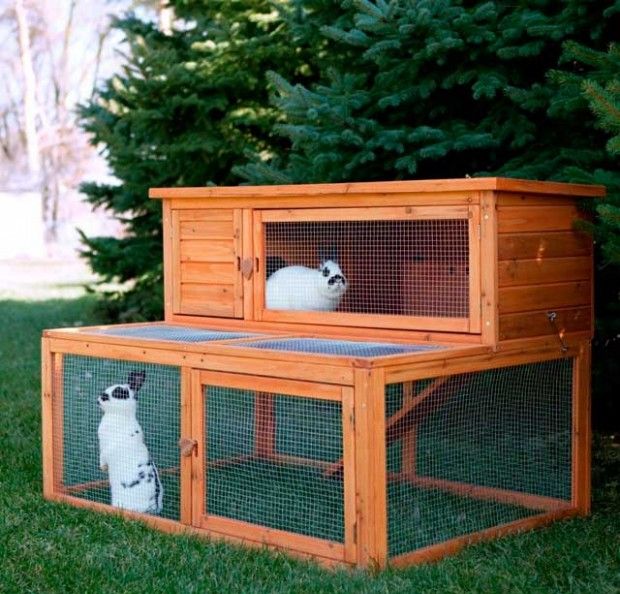
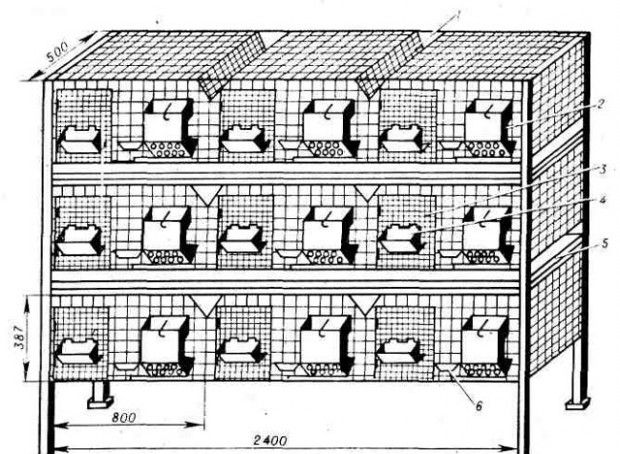
Also cells can be one thing-, two– and three-section. The easiest way to make a two-piece rabbit house is that this is the type that is popular. In addition, there are different cages for young rabbits, adult rabbits, pregnant females, etc. The main differences are size and openness: more is done for pregnant rabbits «deaf» walls.
Required materials and tools
Most often, cells are made made of wood. This material is convenient both in working with it and in operation, in wooden cages rabbits suffer less from heat and cold. However, there are also disadvantages – rabbits love to gnaw wood, which is explained by the lack of minerals in their diet, as well as the constant growth of incisors that the rabbit is trying to grind off. To solve this problem, tin strips should be attached to the protruding wooden parts, and twigs should be placed in the cage so that the animal sharpens its teeth. A thick one is also suitable for walls and roofs. plywood or grid. For the frame and support are usually used, wooden blocks.
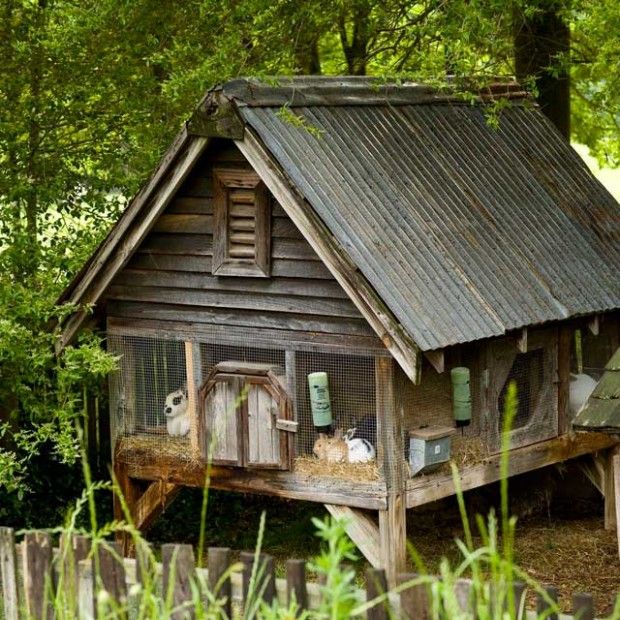
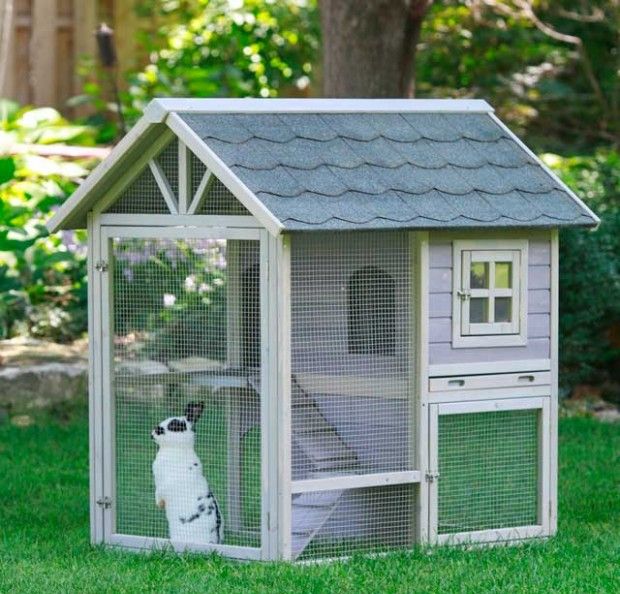
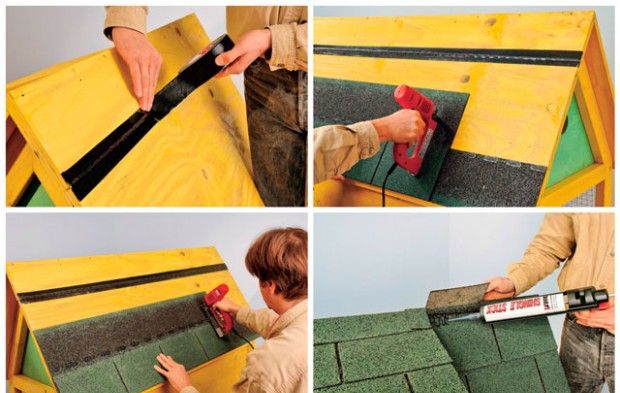
It should be remembered that ordinary boards or plywood will not work for the roof if the cage is located outside. For such a cage, it will be necessary to make a roof of some kind of roofing material – it is important that rain cannot damage the cage and wet the rabbits.
It is important that all materials are smooth, so that the inhabitants of the cage do not pick up splinters and get hurt. Therefore, you should process the materials with sandpaper and carefully monitor that there are no gaps and protruding parts anywhere..
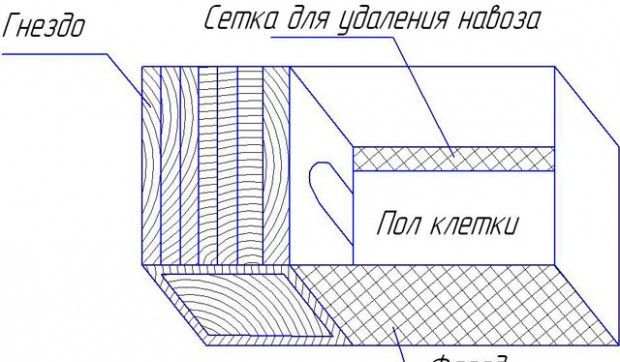
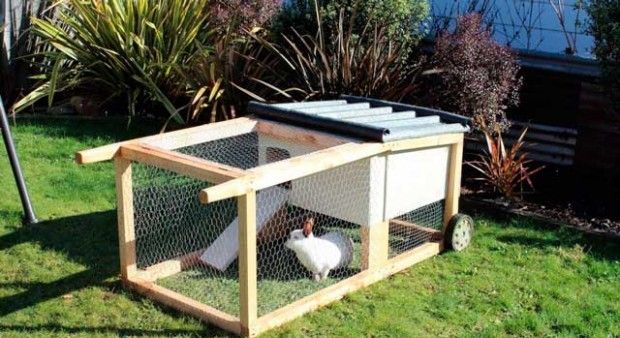
In addition, the floor of the cage should be metal mesh or put slatted flooring – this will help maintain the best sanitary conditions. At the same time, it is important that the mesh cells are not very large, and the rabbit paws cannot fall through and get stuck in them: this will lead to injuries. The most successful are the sizes 16×48 and 18×48, less often – 20×20.
There is nothing supernatural in the tools that you will need when assembling the cage, it is unlikely that you will need to buy something specially: a hammer and nails, screwdriver and screws, self-tapping screws, roulette and so on can be found in any home.
You will also need to buy loops and gate valves for the device of the door, and, in addition, feeder and drinker.
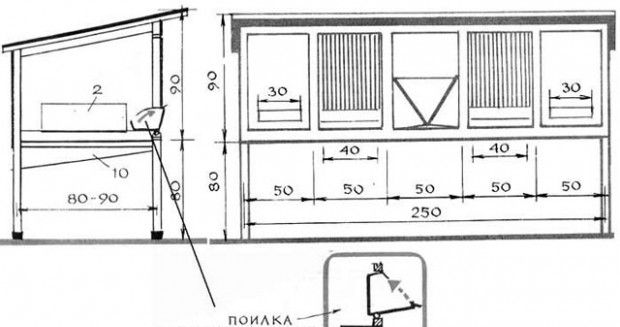
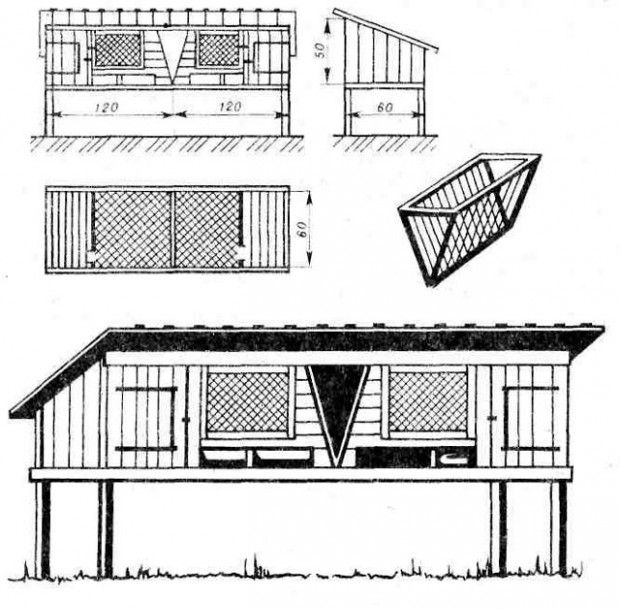
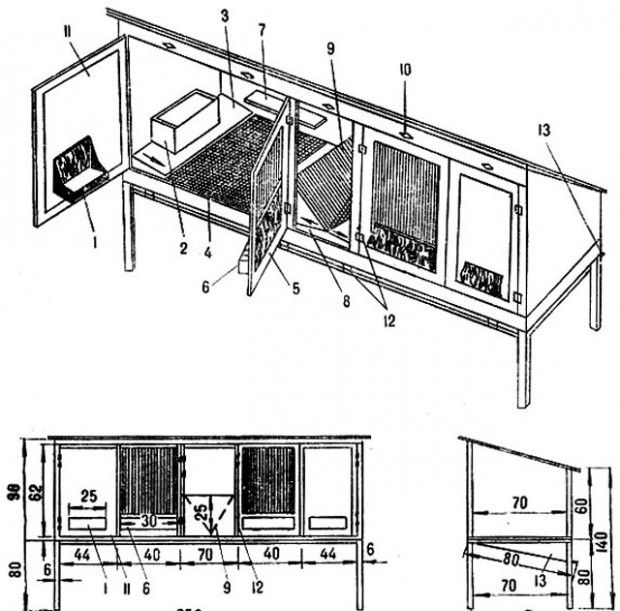
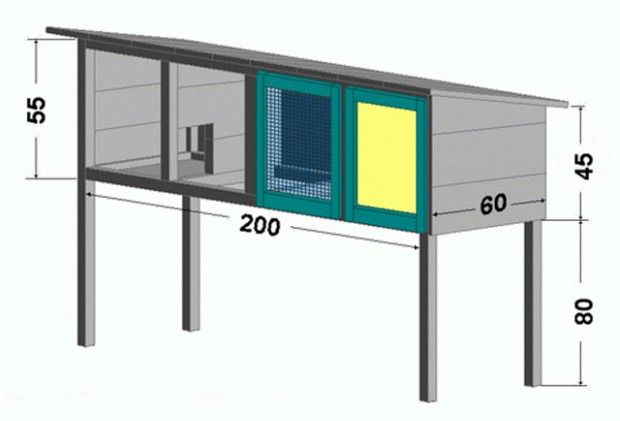
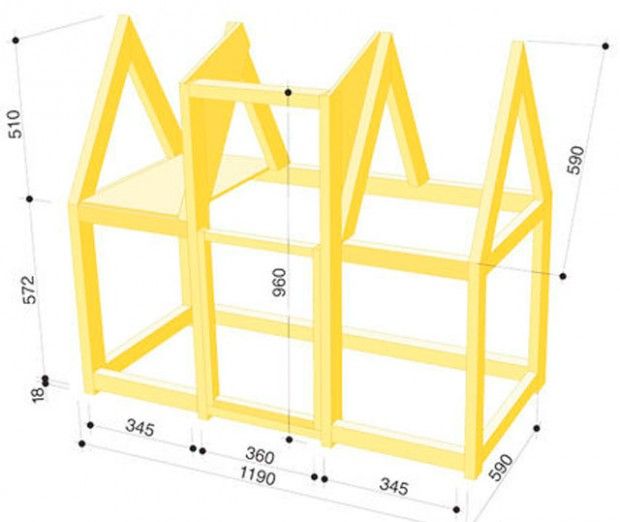
DIY rabbit cages: drawings and dimensions
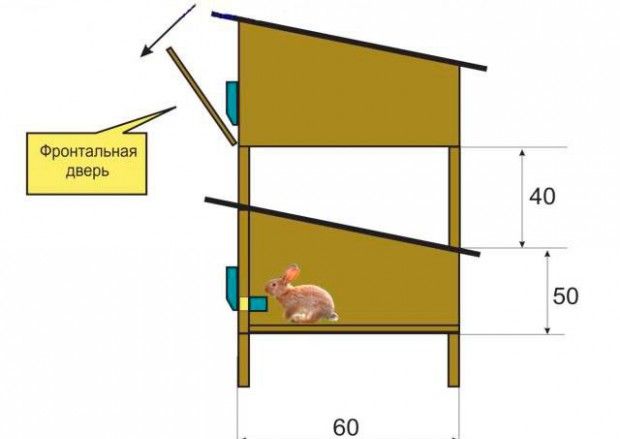
The size of the cage depends on the number of pets, their age, breed and size. For a large rabbit, you need a cage with parameters 150x70x50 cm, for a smaller rabbit – 90x60x45. A cage for a pregnant rabbit should be made about 120x70x60 cm.

If this is your first time making a cage for a rabbit, you should not choose too complex designs and drawings. Remember: even if you use ready-made drawings, you will have to think out some details yourself. Don’t forget the wise saying: «Seven times measure cut once» – it is wiser to mark all the details on the drawing, from dimensions to the location of the feeders, than to think out everything on the go.

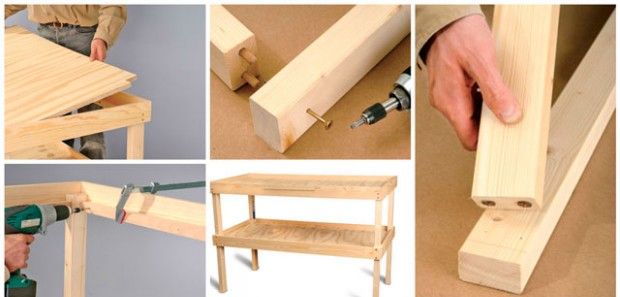
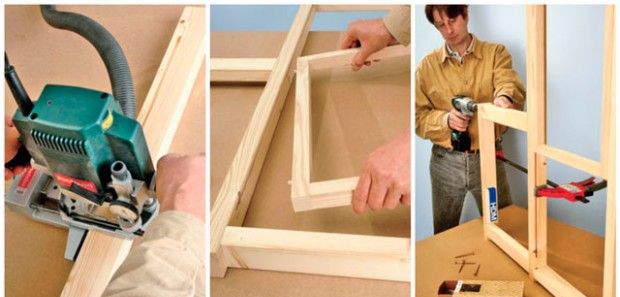
DIY rabbit cages: stages of creation
- First of all, it is chosen place for a cell. Make sure that it is not exposed to all winds and drafts: rabbits can catch cold.
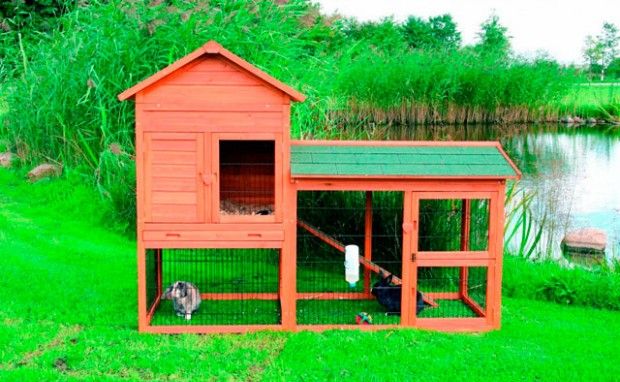
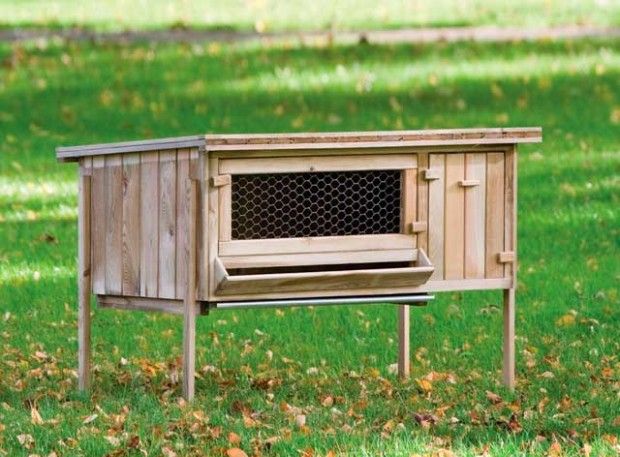
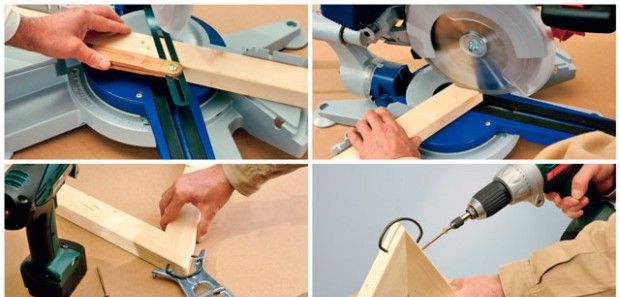
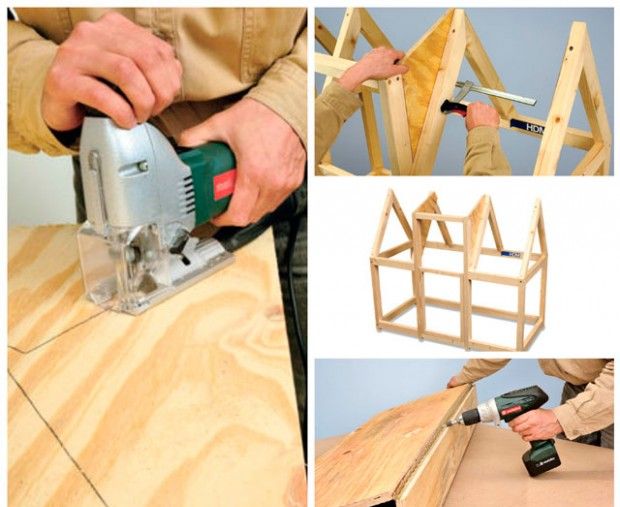
- Further it is constructed carcass. As a rule, the front is made slightly higher than the rear, so that the roof is ultimately sloped. Frame walls are sheathed with plywood or planks of your choice.
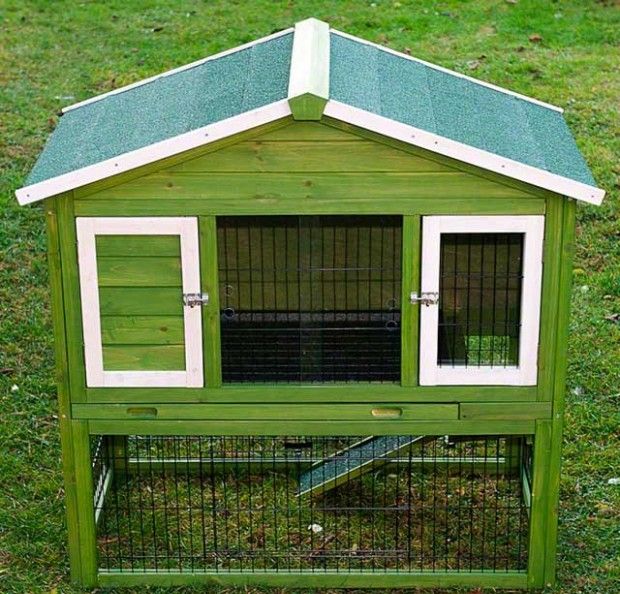
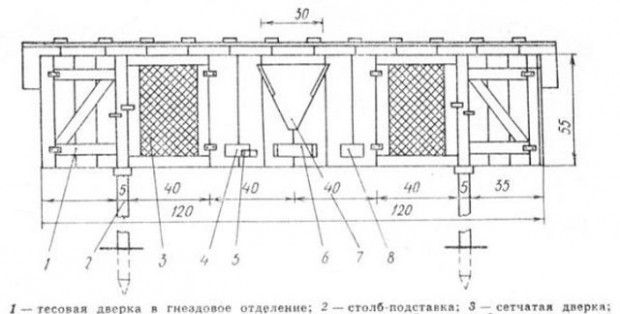
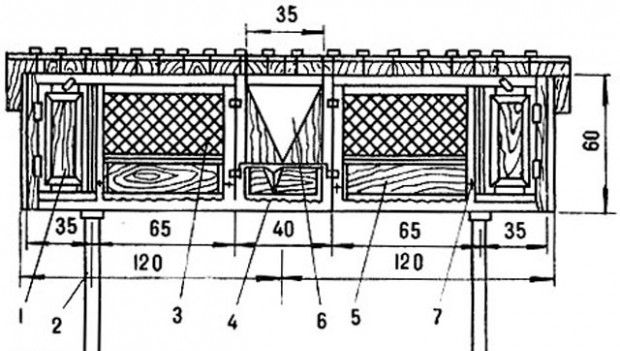
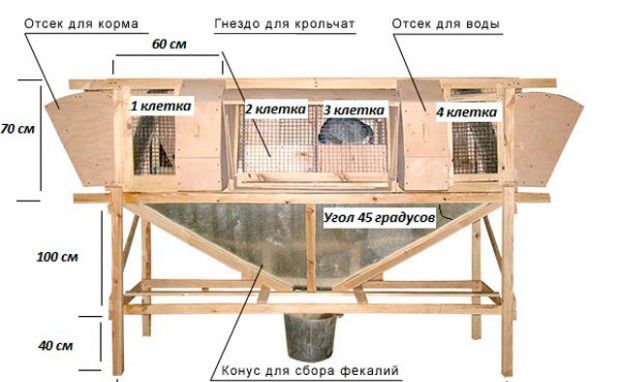
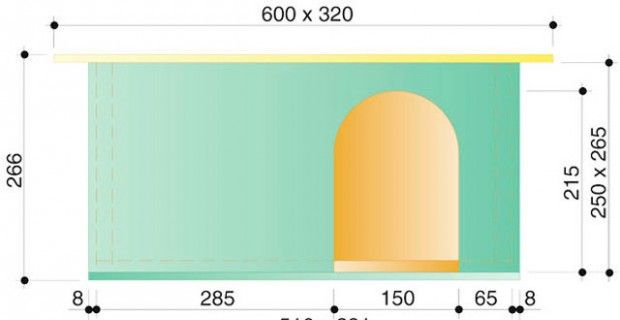
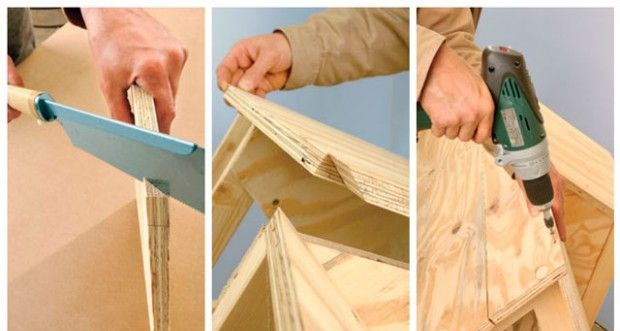
- If you plan to arrange a nesting compartment in a cage, make solid floor made of wood. If there is no such compartment, the entire floor is made of fine mesh. A partition is placed between the compartments, in which a rabbit hole is cut. This hole should be 20 cm in diameter. As a rule, it is upholstered with tin so that the rabbits do not chew on the partition. It is important that the upholstery does not create any gaps that rabbits can hurt themselves..
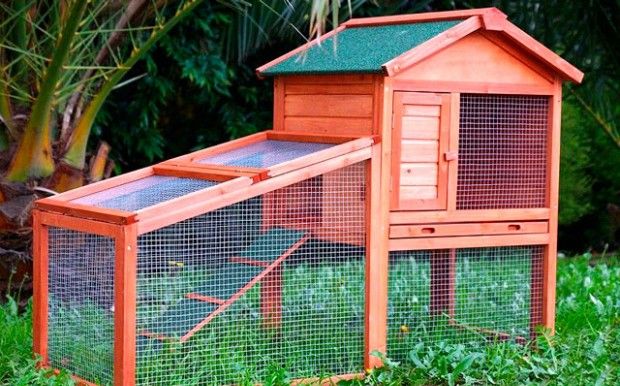
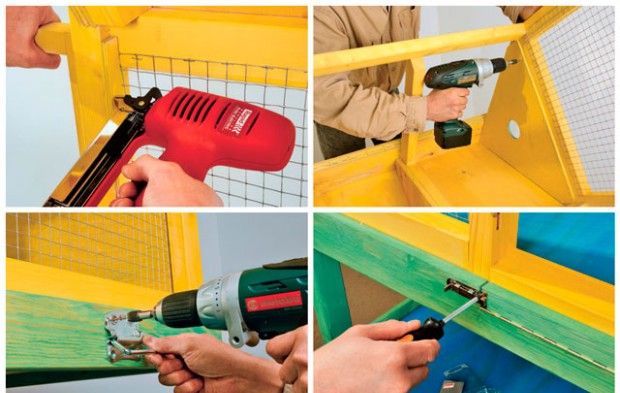
- Roof hinged to facilitate cleaning of the cage. It also makes sense to make it completely removable: it is important that you can always easily get to the inner space of the cage to clean it or help the rabbits if something happens to them..
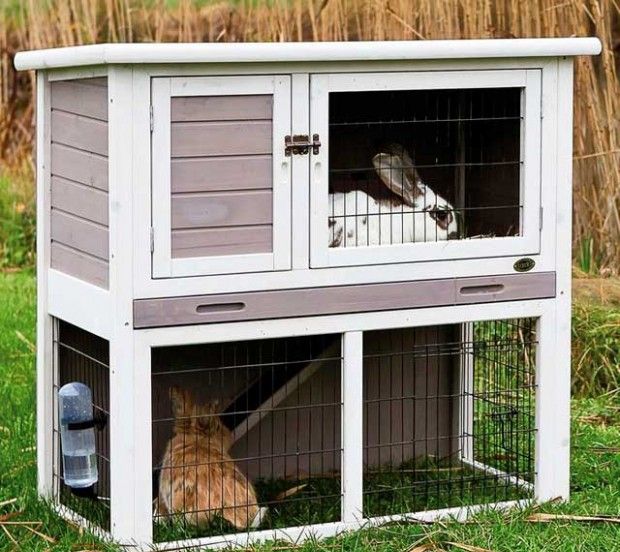
- Doors they are also hung on the hinges – it is most convenient to make them folding so that they open from top to bottom. A wooden door is made to the nest compartment, a mesh door to the stern compartment.

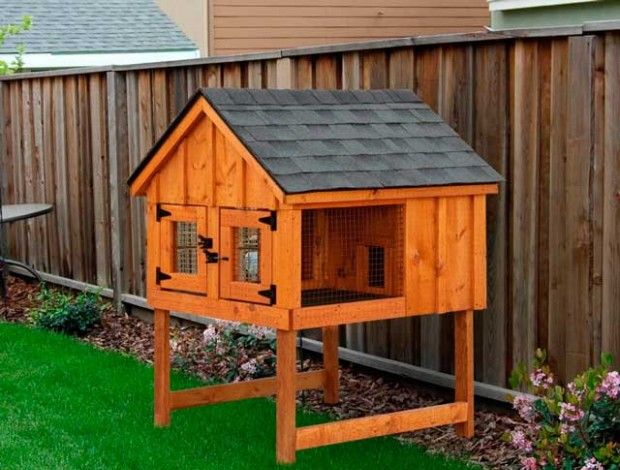
It is necessary that the cage is 15 cm from the floor if it is located in an apartment, and 70 cm for a street cage. This is done so that the rabbits are not gnawed by rodents on the street, and a gap for the pallet is needed in the house. The pallet is tilted to make cleaning the cage easier..
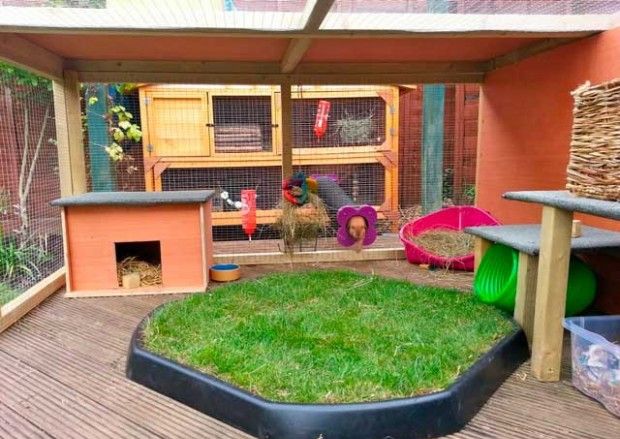
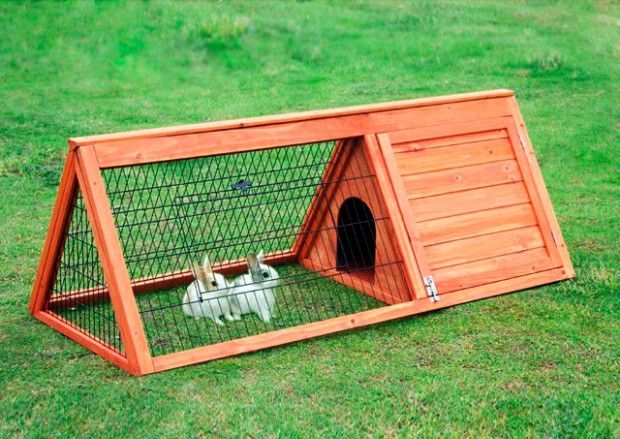
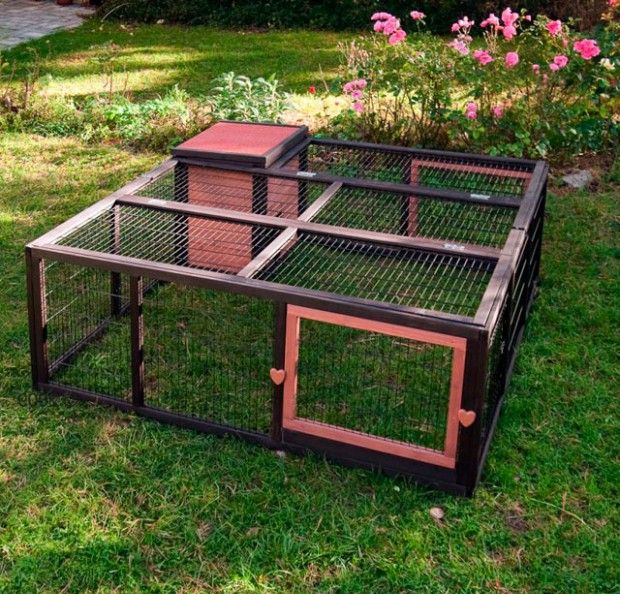
If the cage is outside, you can do rabbit walk. As a rule, this is a structure of mesh or planks connected to the main square. If you buy a ladder and successfully adapt it, you can give the rabbit the opportunity to sometimes walk on the grass, even without the supervision of the owner..
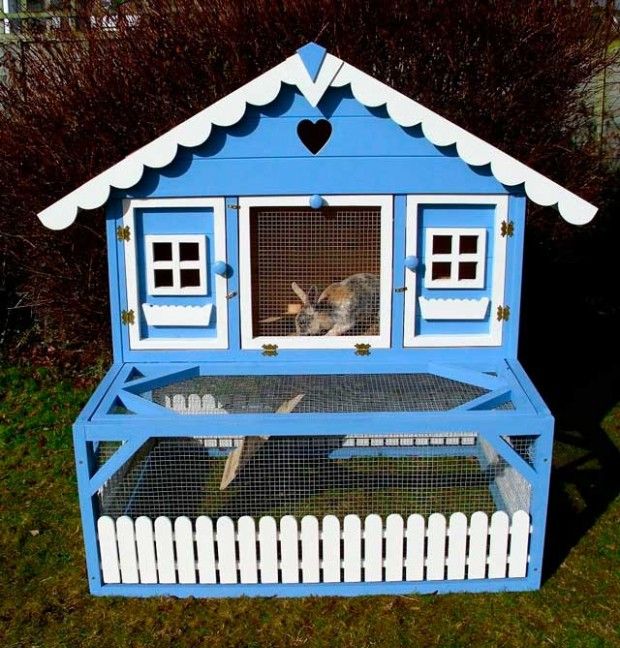
Rabbit cages: photo
A do-it-yourself rabbit cage is the best solution for both the owners and their eared ears. For both regular rabbits and decorative rabbits, it is best to make your own cage. Only then will you know that it is made soundly and with love, and the animals in it are comfortable and safe..